A new start
The Calliope mini 3.0 can now also be used with the Joy-Car. This extension opens up new possibilities and makes the Joy-Car even more versatile. Support for the Calliope mini 3.0 creates greater flexibility so that different microcontrollers can be used, which enables a certain degree of platform independence.
Do you have little programming experience? Then MakeCode is the perfect way to familiarize yourself with the Joy-Car. With MakeCode, you can put together colored blocks that represent the functionalities of the Joy-Car without having to write a single line of code. And yet this system brings you closer to programming and prepares you for a fully-fledged programming language. With MakeCode, for example, it can be child's play to make the Joy-Car drive and stop as soon as an obstacle is detected.
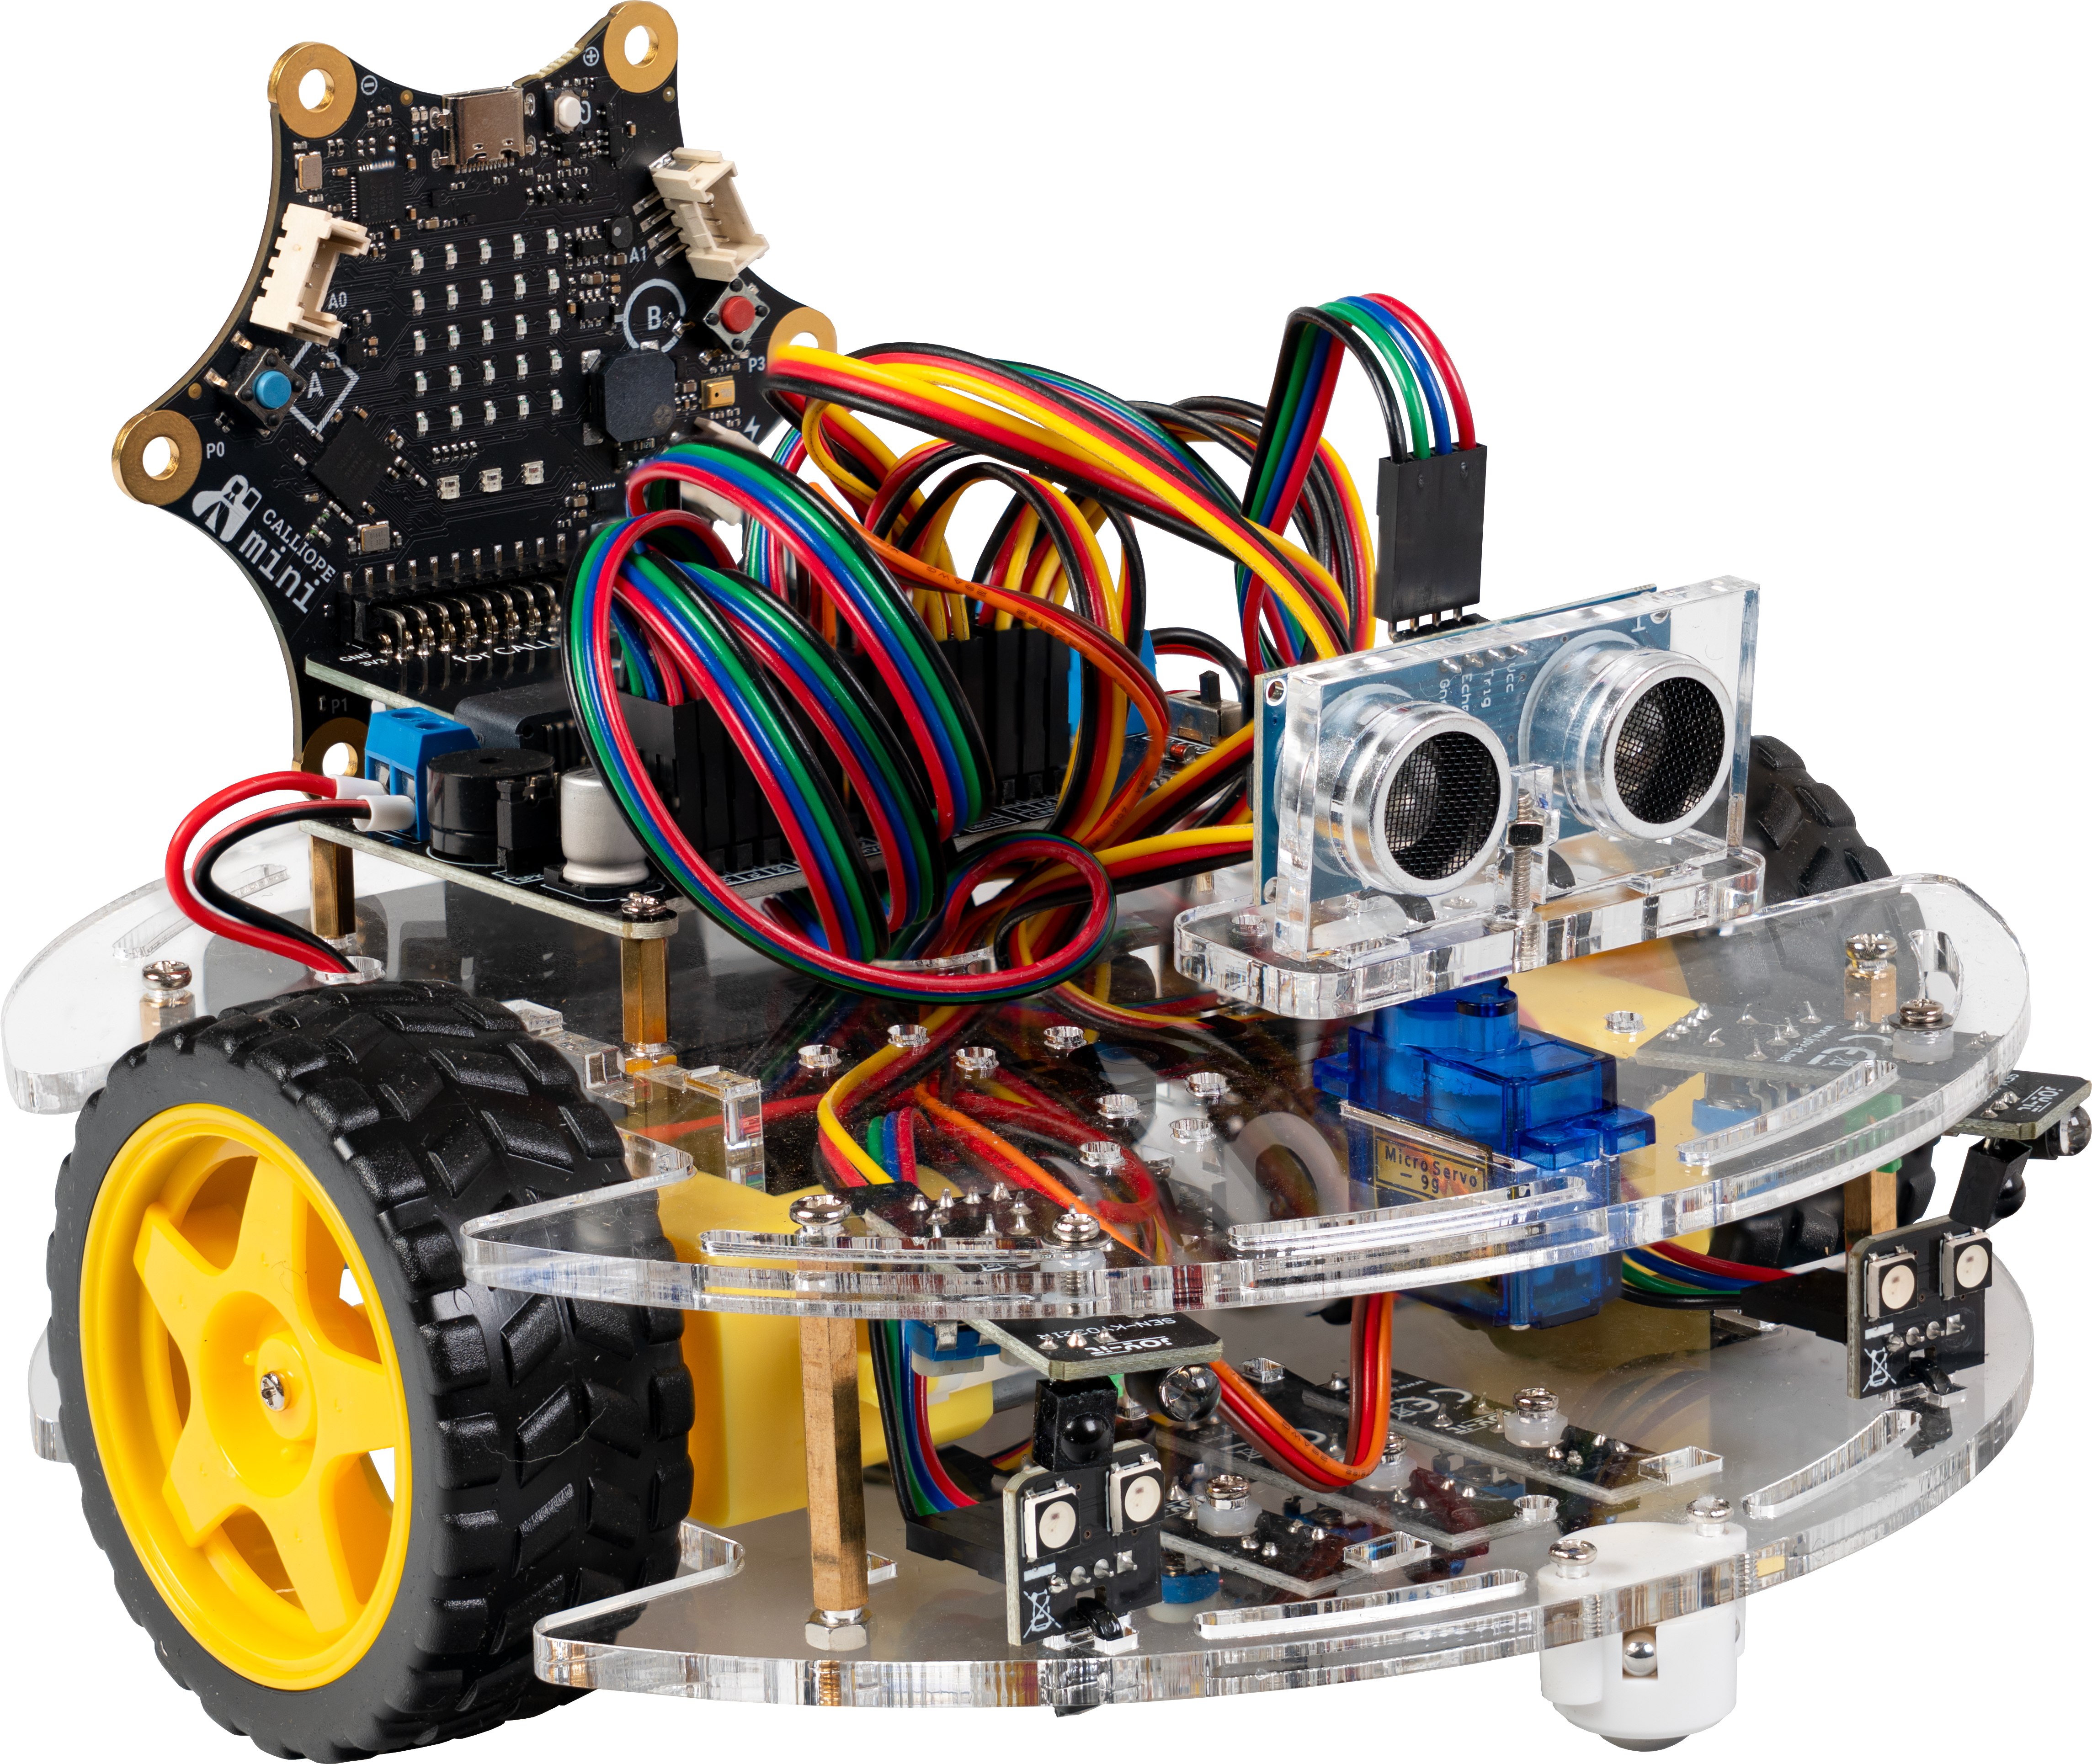
Here you will find everything you need to know to get started with your Joy-Car and the Calliope mini 3.0. The Calliope mini 3.0 is a versatile microcontroller that was specially developed for the education sector and makes it easy to get started with programming thanks to its intuitive operation. With integrated sensors, a speaker, an RGB LED and numerous connection options, it offers a wide range of possible applications for creative and interactive projects.
You can access the MakeCode web interface for the Calliope here.

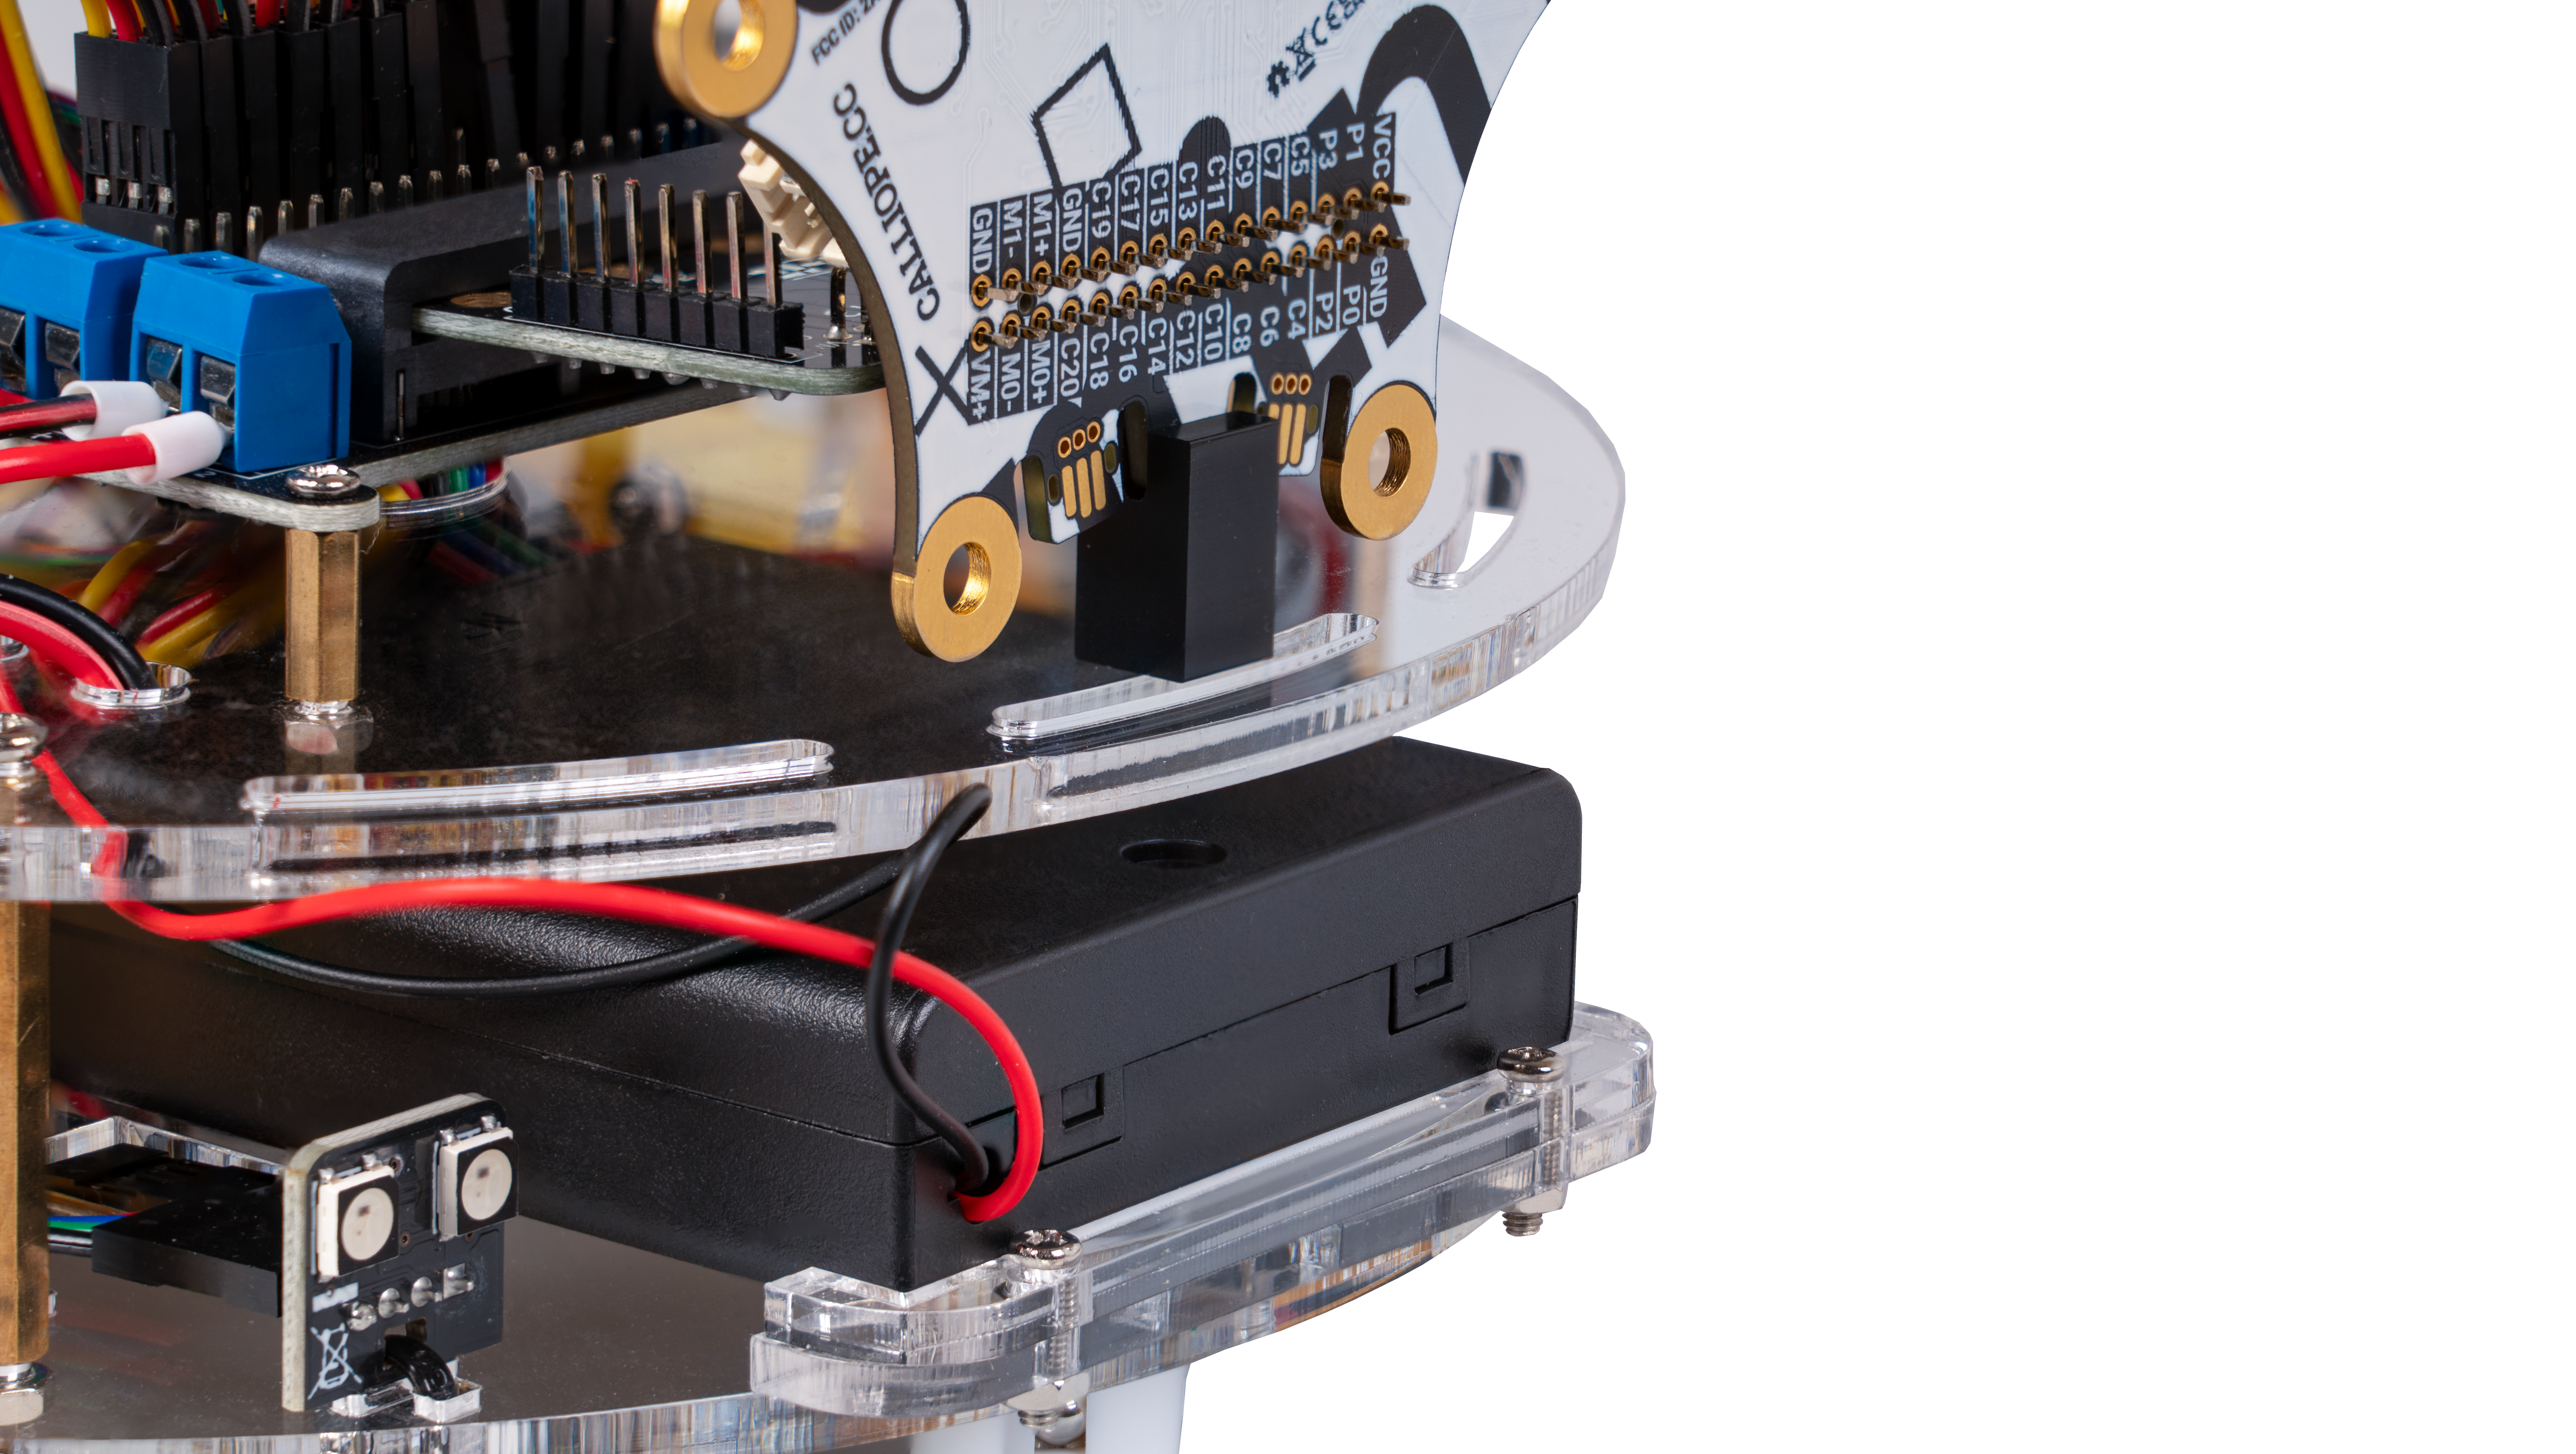
In order to use the Calliope mini 3.0 with the Joy-Car, you need a special adapter board together with a mounting spacer, which serves as a connection between the microcontroller and the vehicle.
The Calliope is plugged directly onto the adapter board with its pin header, and the mounting spacer is plugged onto the middle Jacdac connector, ensuring that all necessary contacts are securely connected. Then place the adapter board on the Joy-Car's mainboard to enable control. This connection ensures that the Calliope can fully utilize all of the Joy-Car's functions, such as motor control and sensors.
A new project
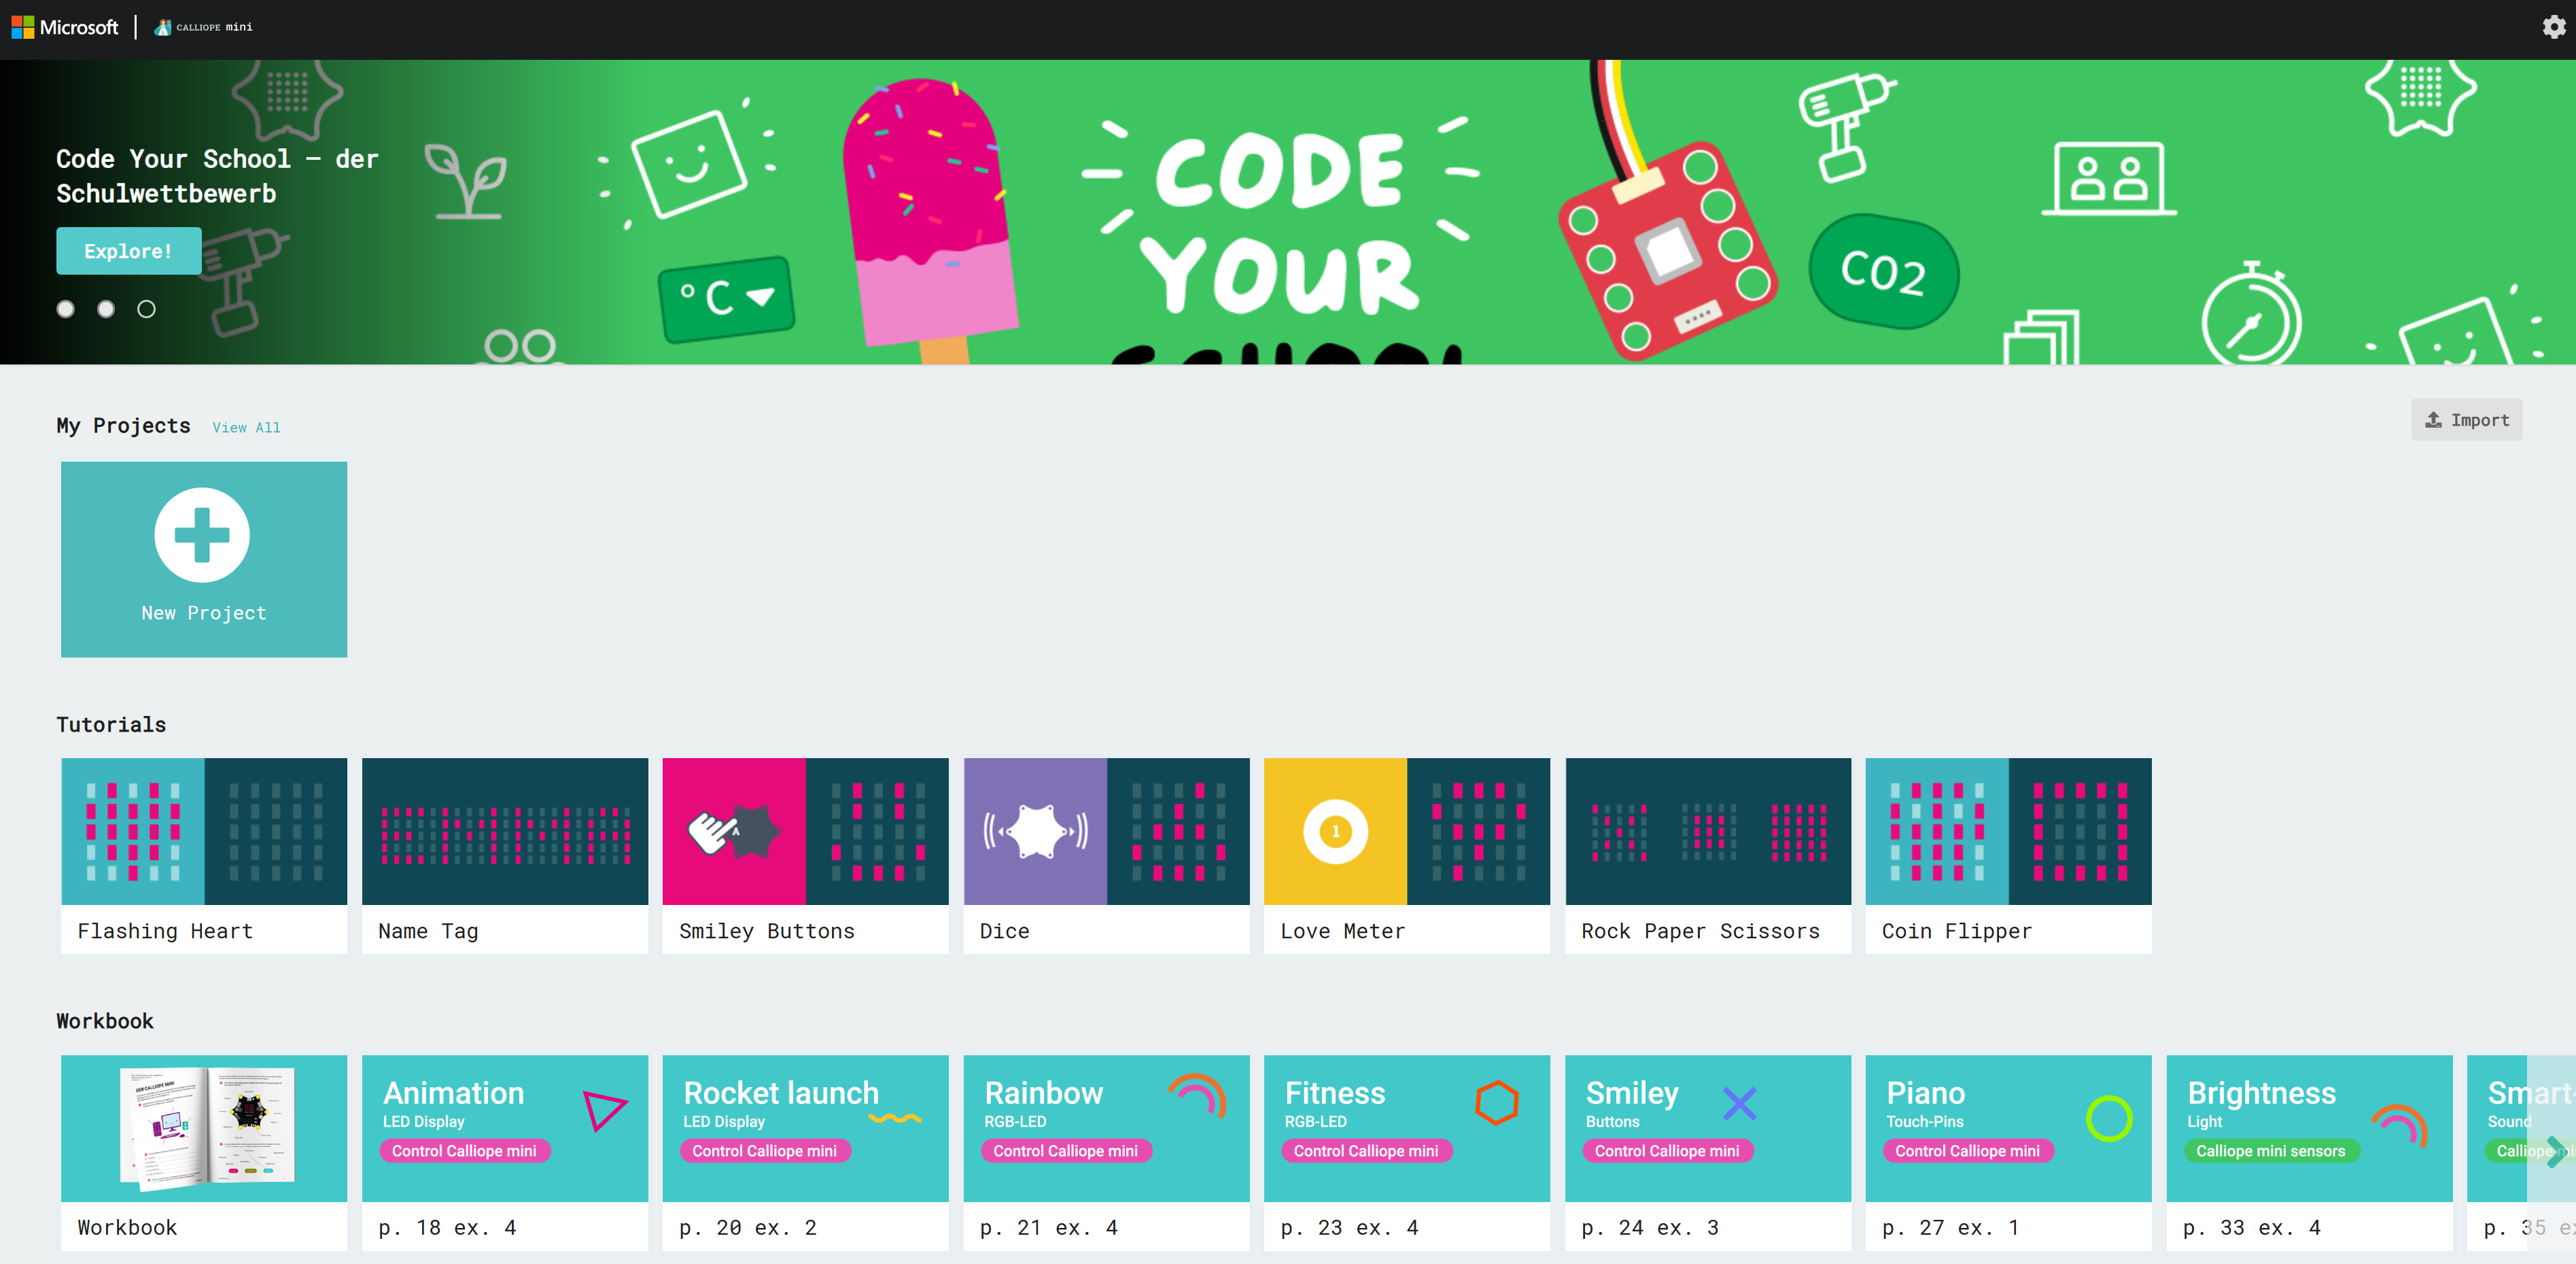
This is where it starts as soon as you enter the page or start the program. All your projects are listed in the middle area. You can also create a new project here. Give it a try and create your first project by clicking on “New project”!
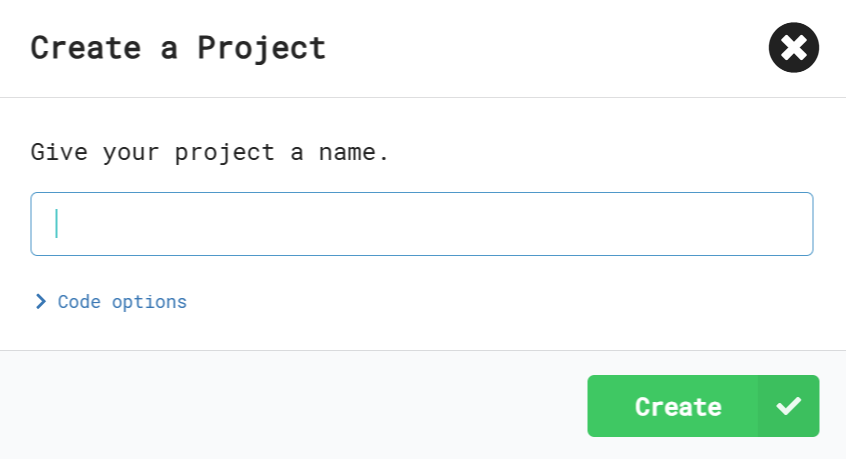
All you have to do is give your new project a name and you're ready to go.
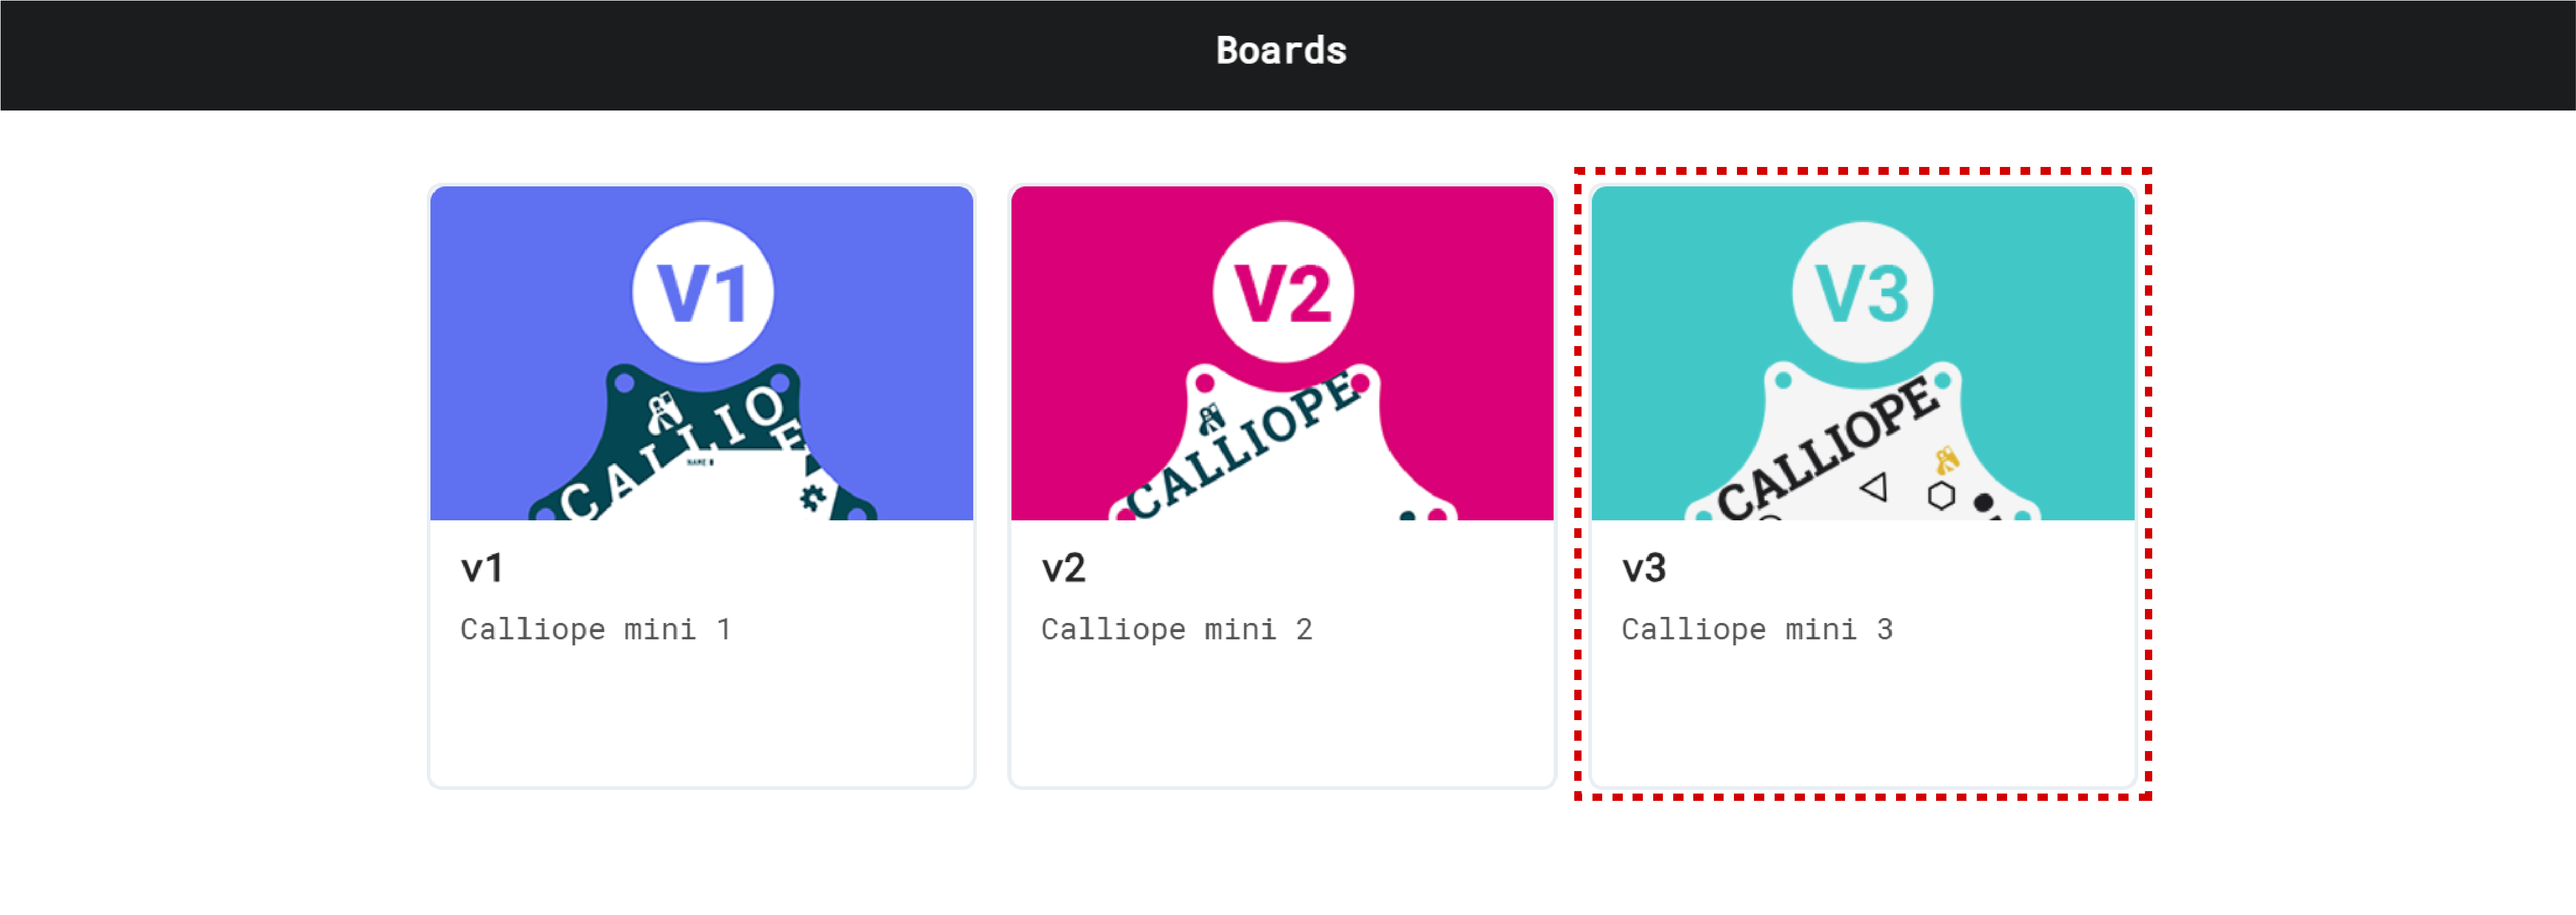
When starting a new project in MakeCode, it is important to select the hardware used correctly. This includes specifying the revision of the Calliope mini, as different versions have different functions and interfaces. As the Joy-Car is only compatible with Calliope mini 3.0, this version must be selected when setting up the project to ensure smooth control and use of all functions.
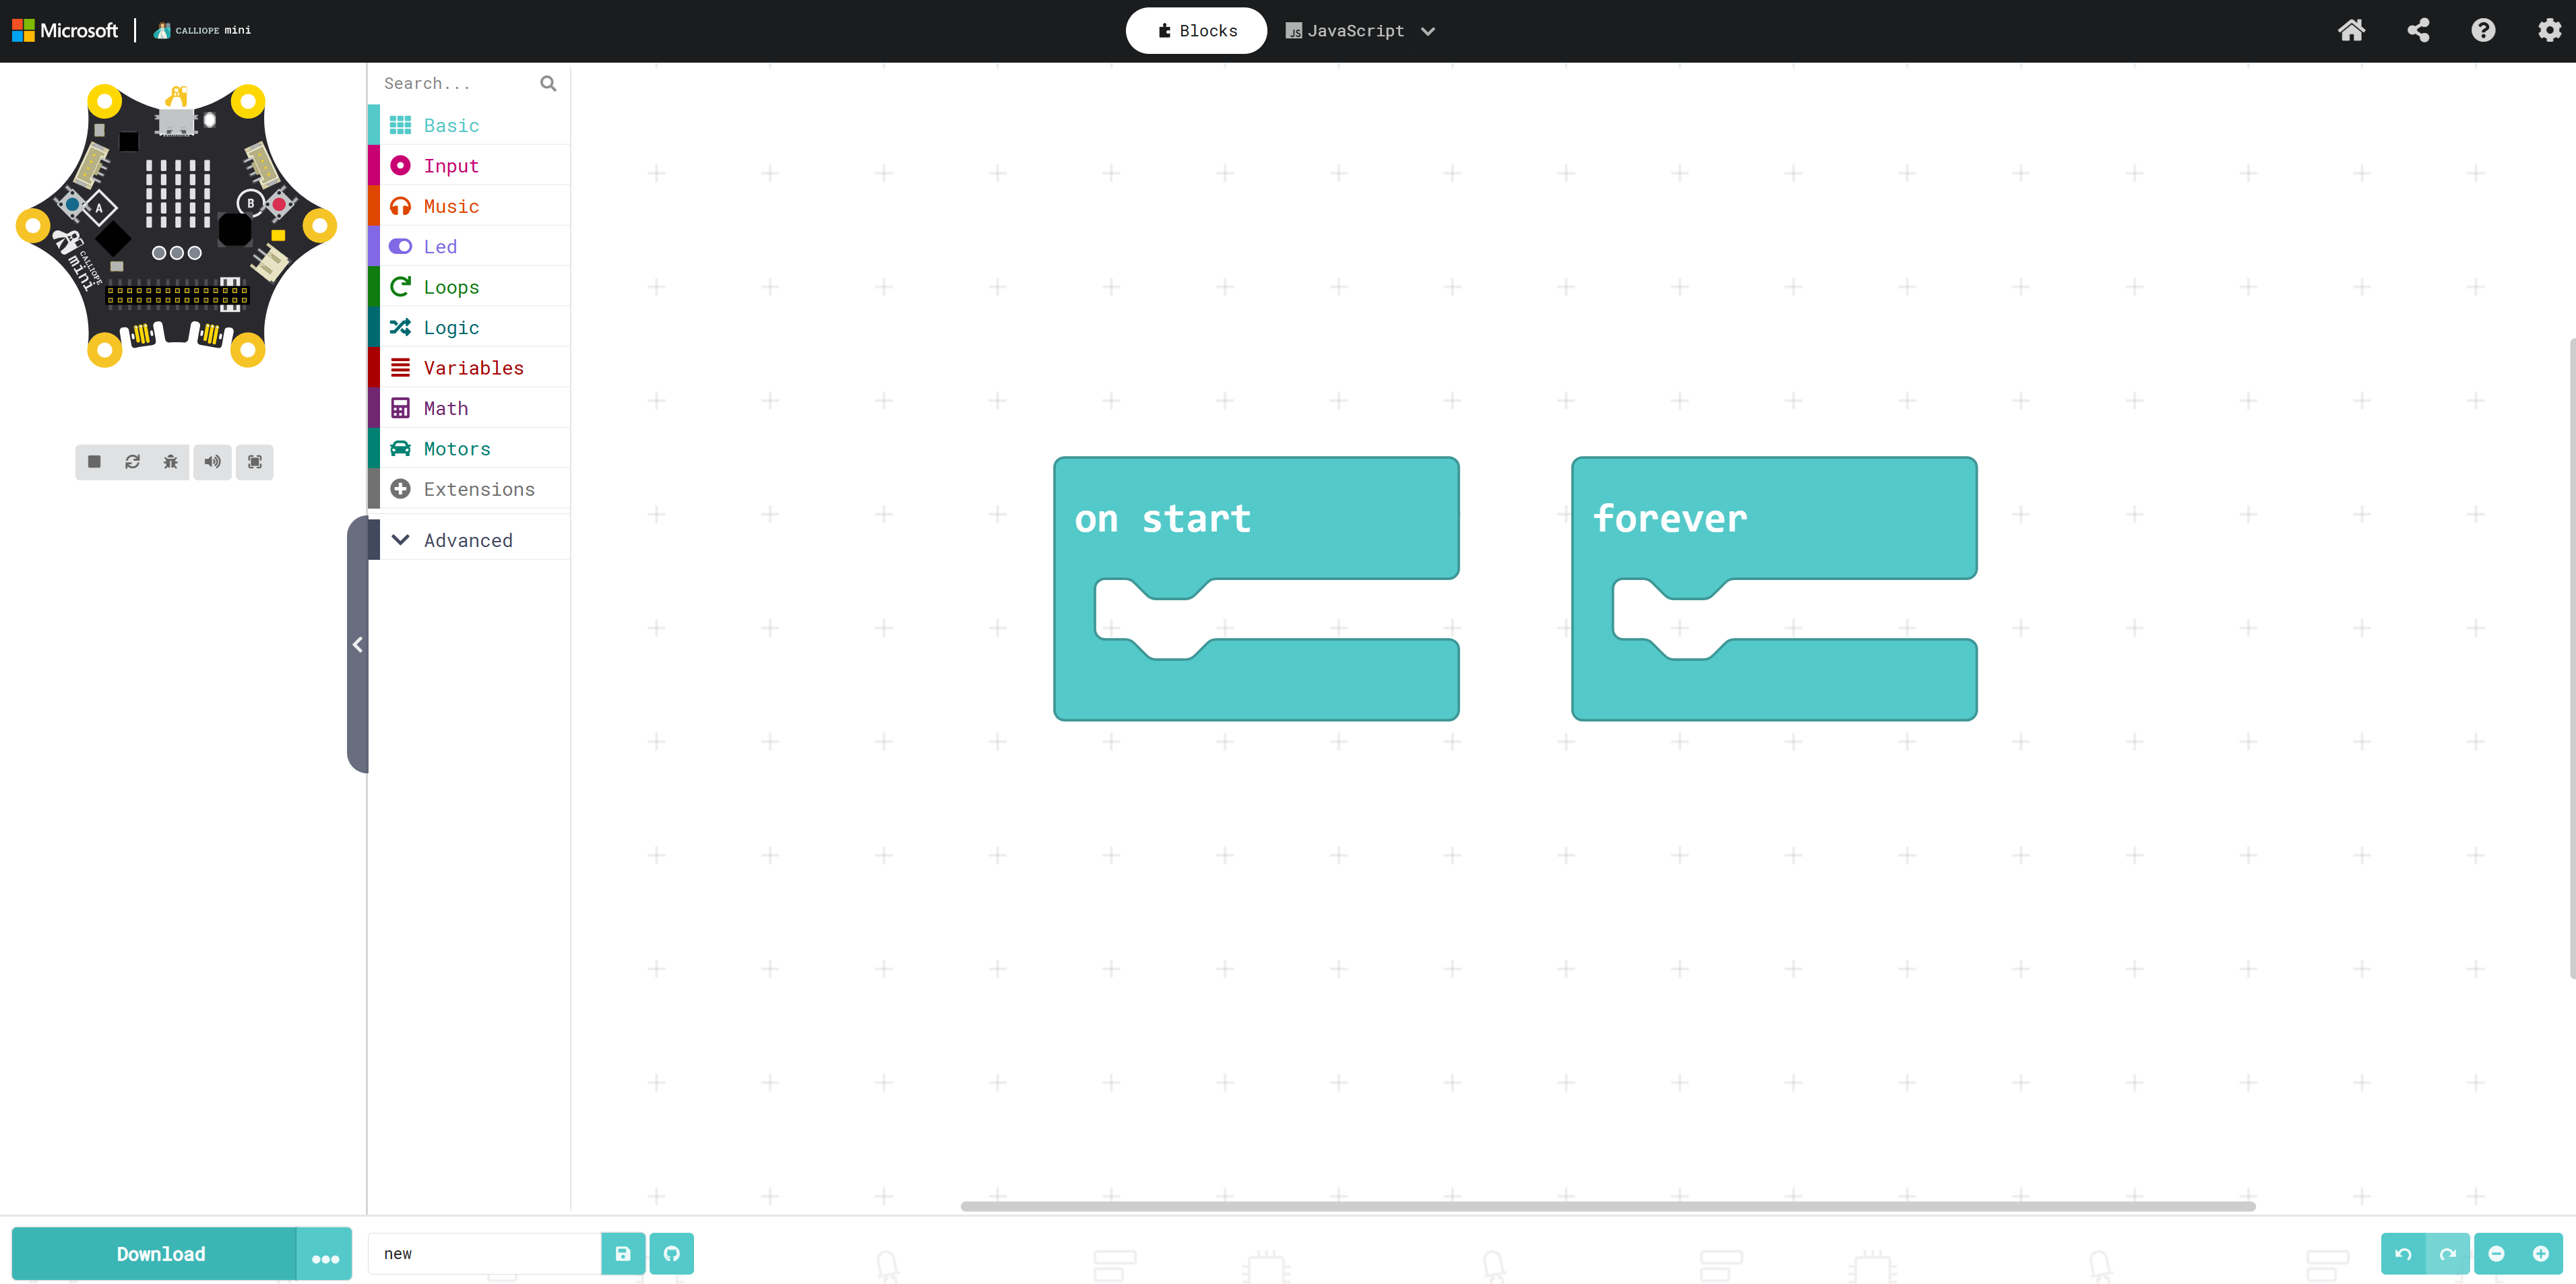
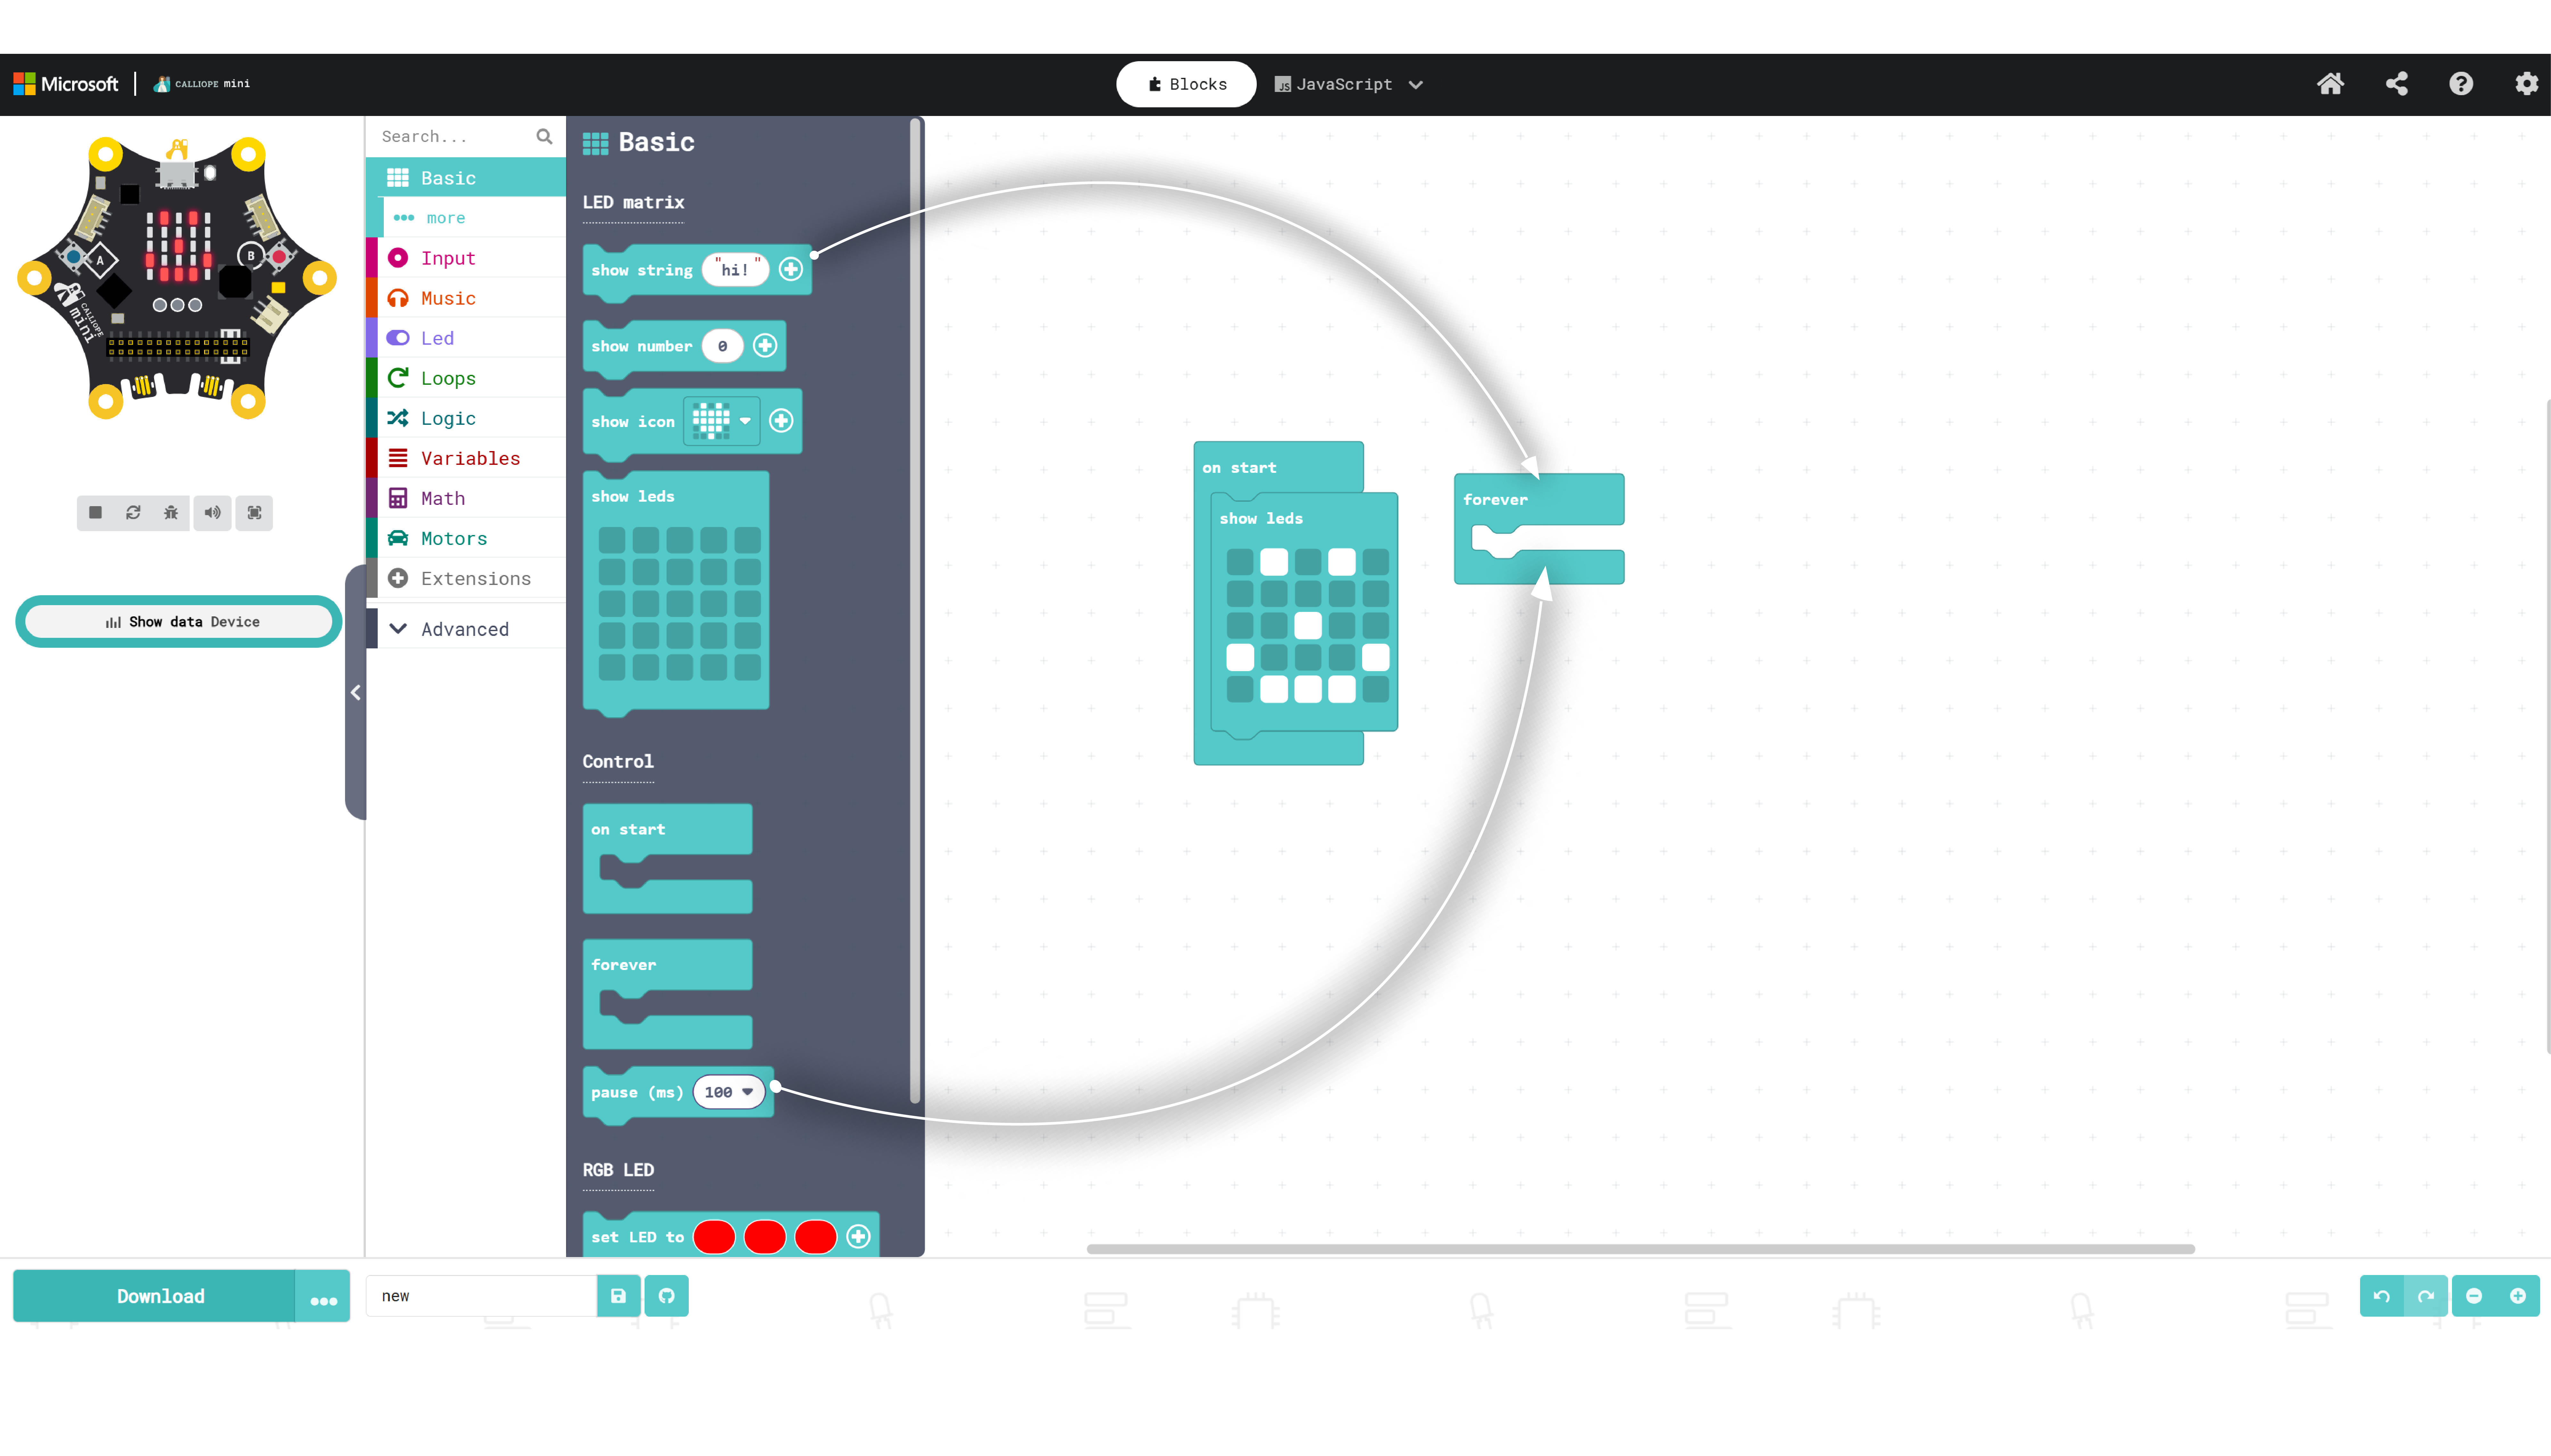
Next, you start directly in the development environment and can put together your first blocks. We will now create a small sample project together for your first project. To do this, first open the “Basics” block area on the left.
You can find more information on the basics of programming in the following chapters.
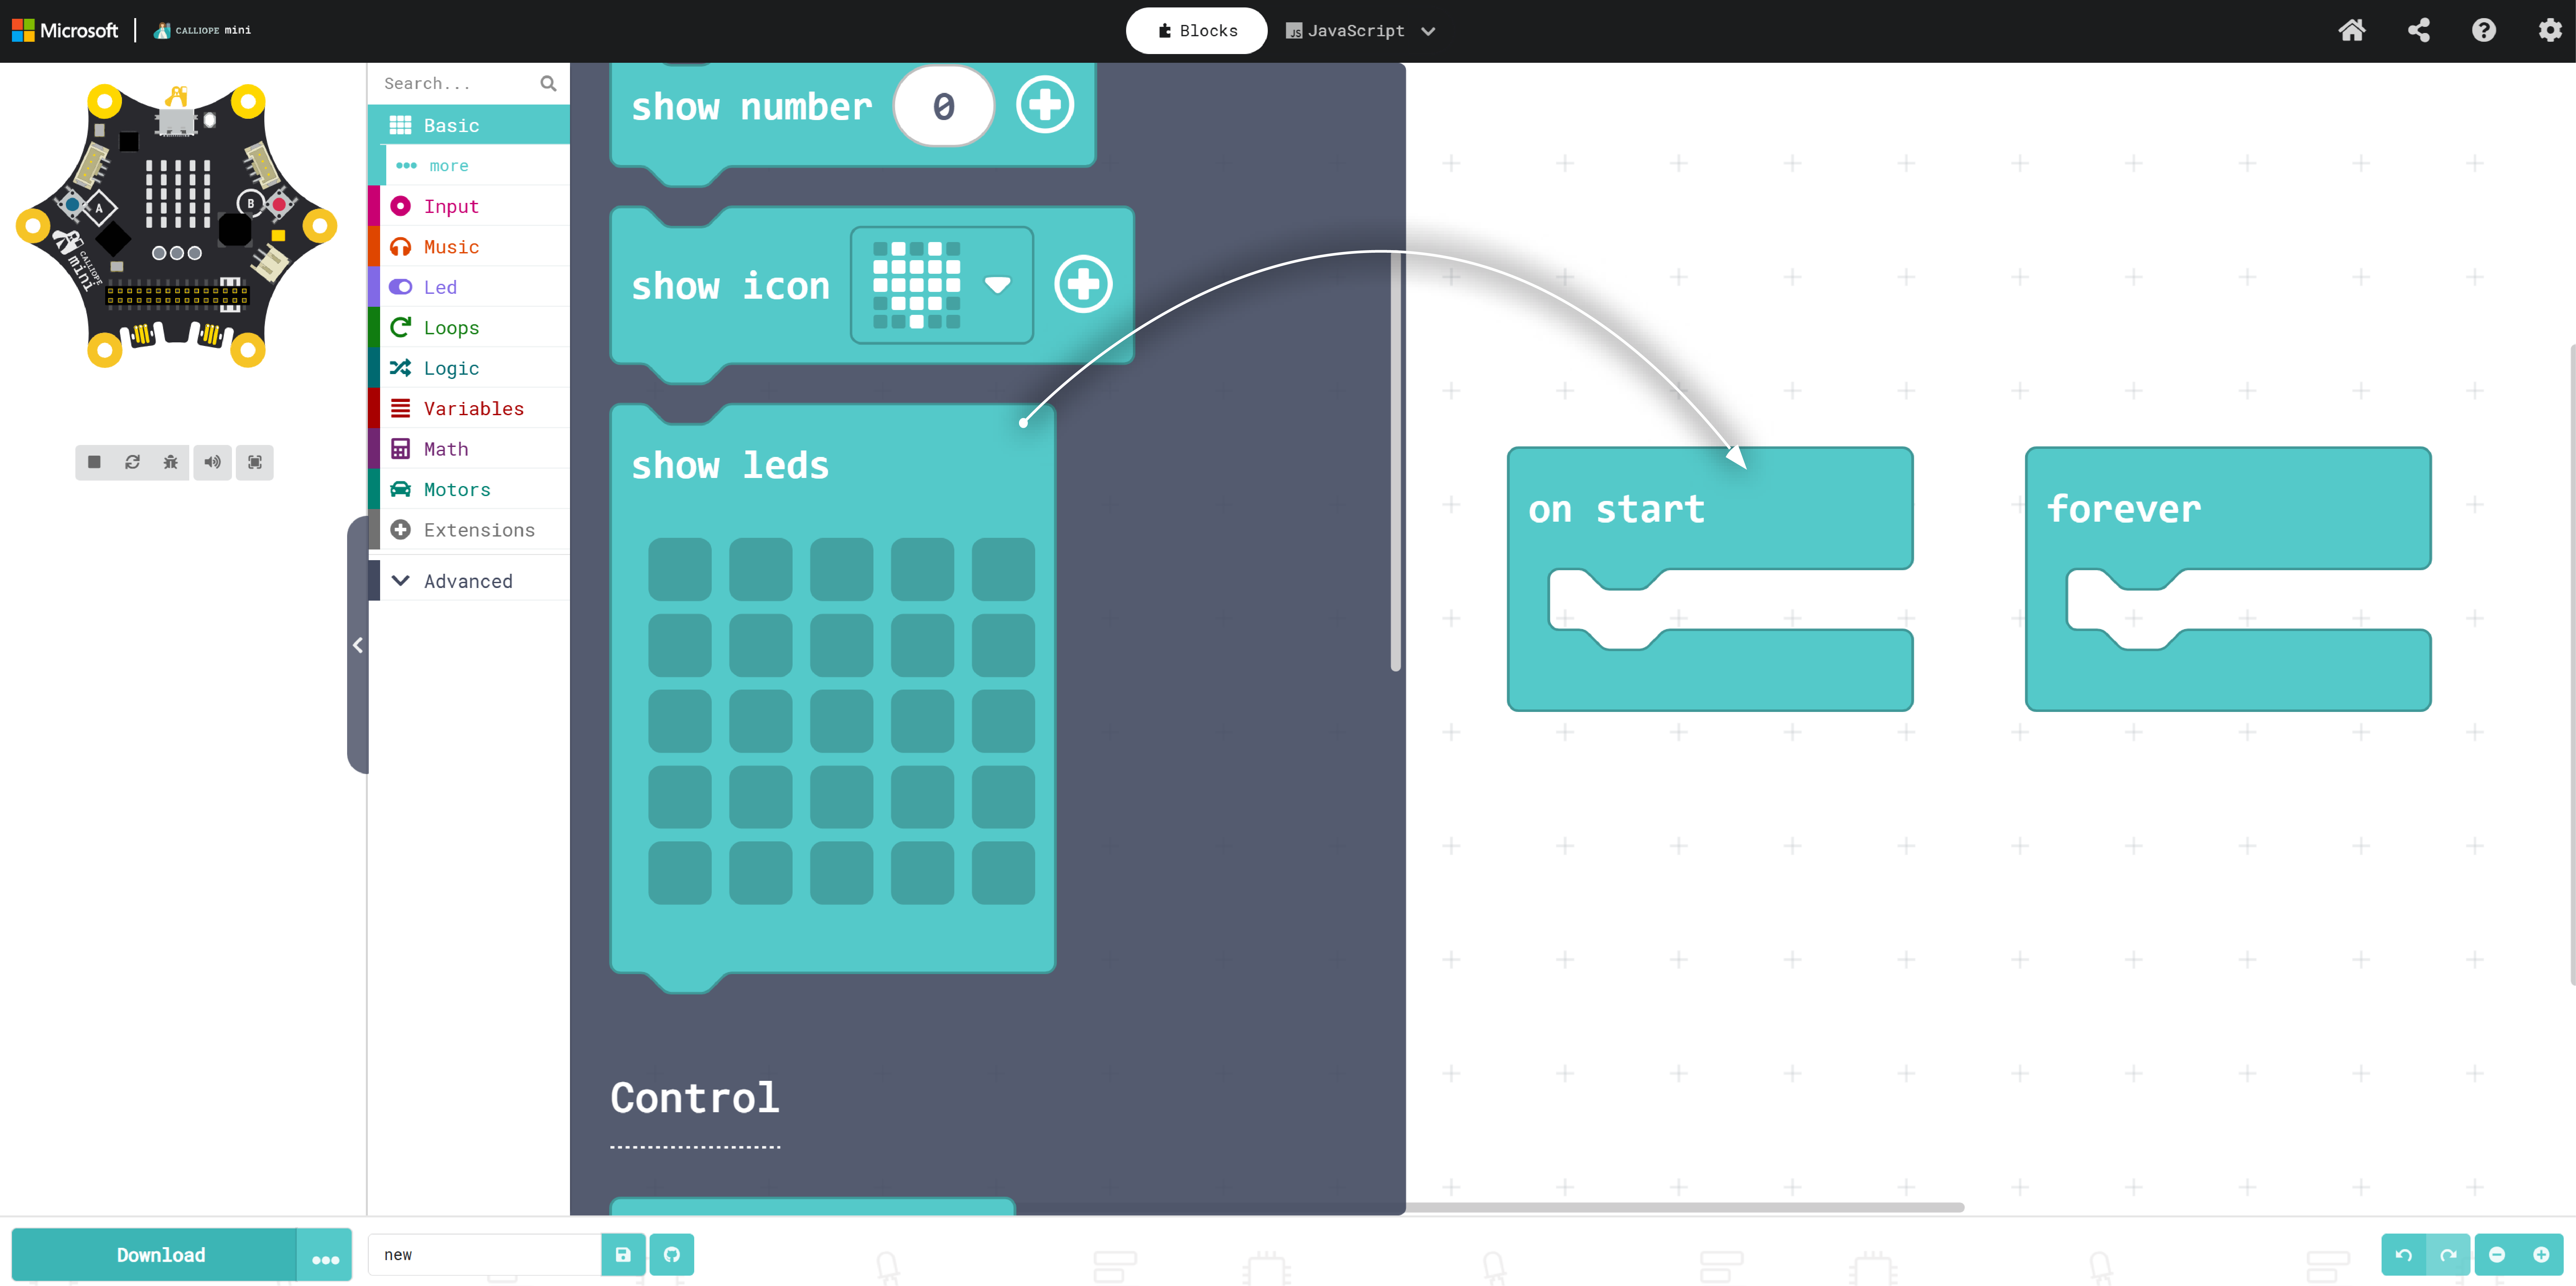
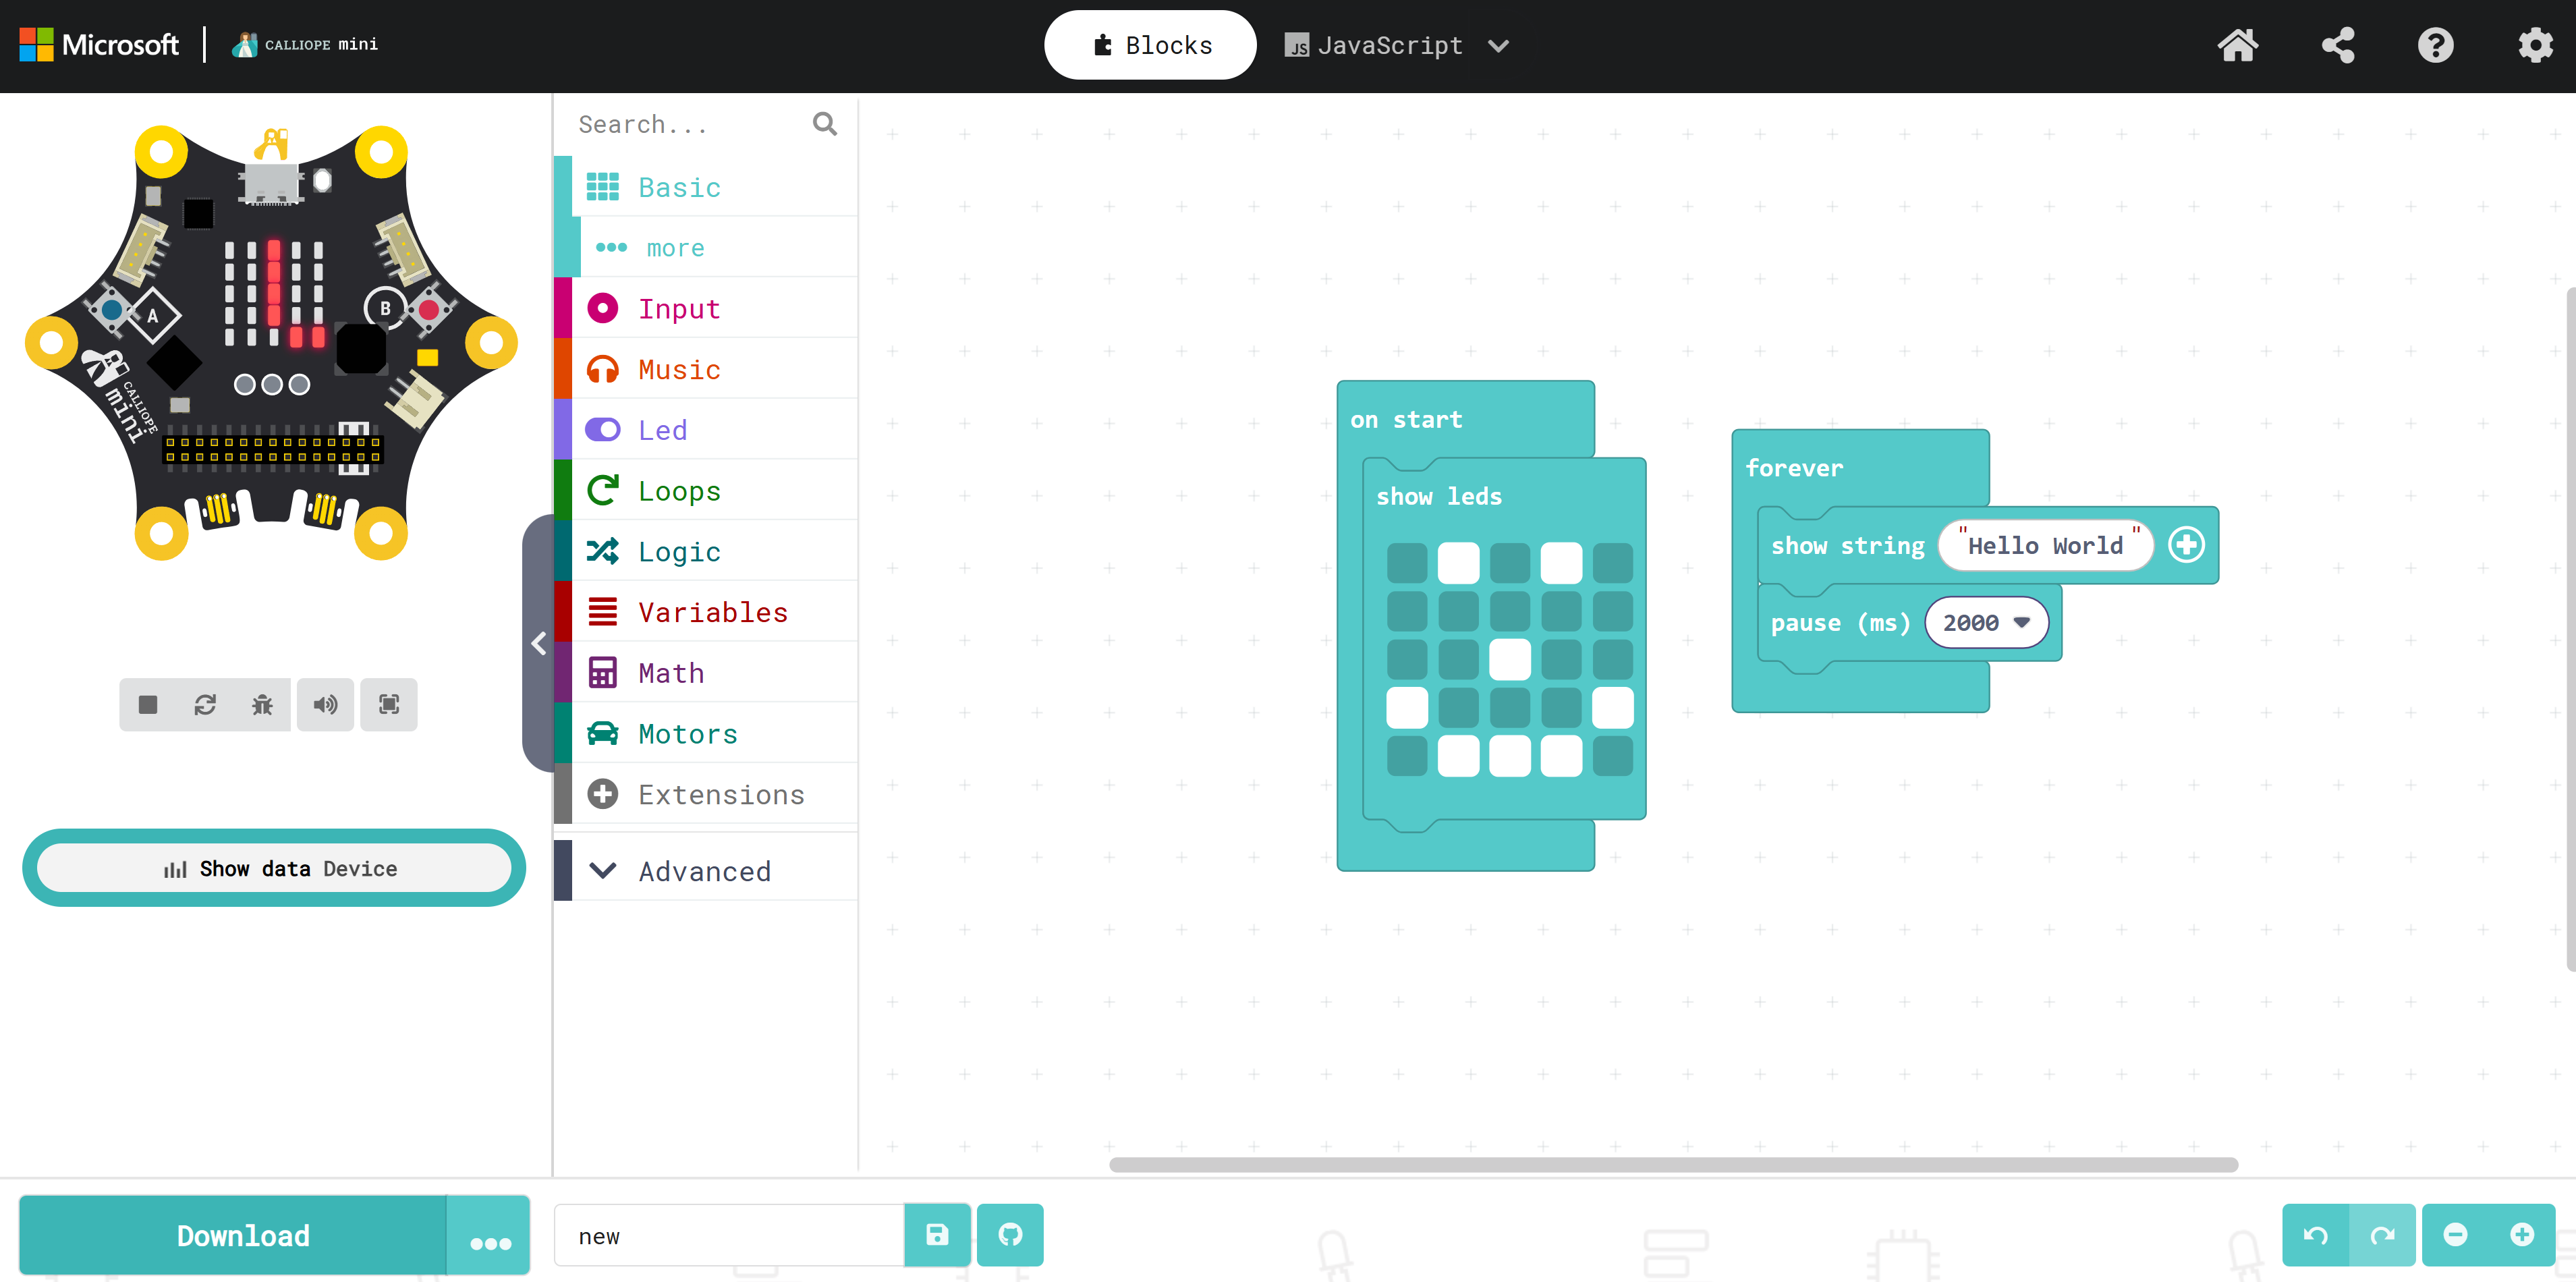
You will see that the block overview has expanded and the category you just clicked on has opened. Now take the “Show LEDs” block from this area and simply drag it with your mouse into your “on start” execution block.
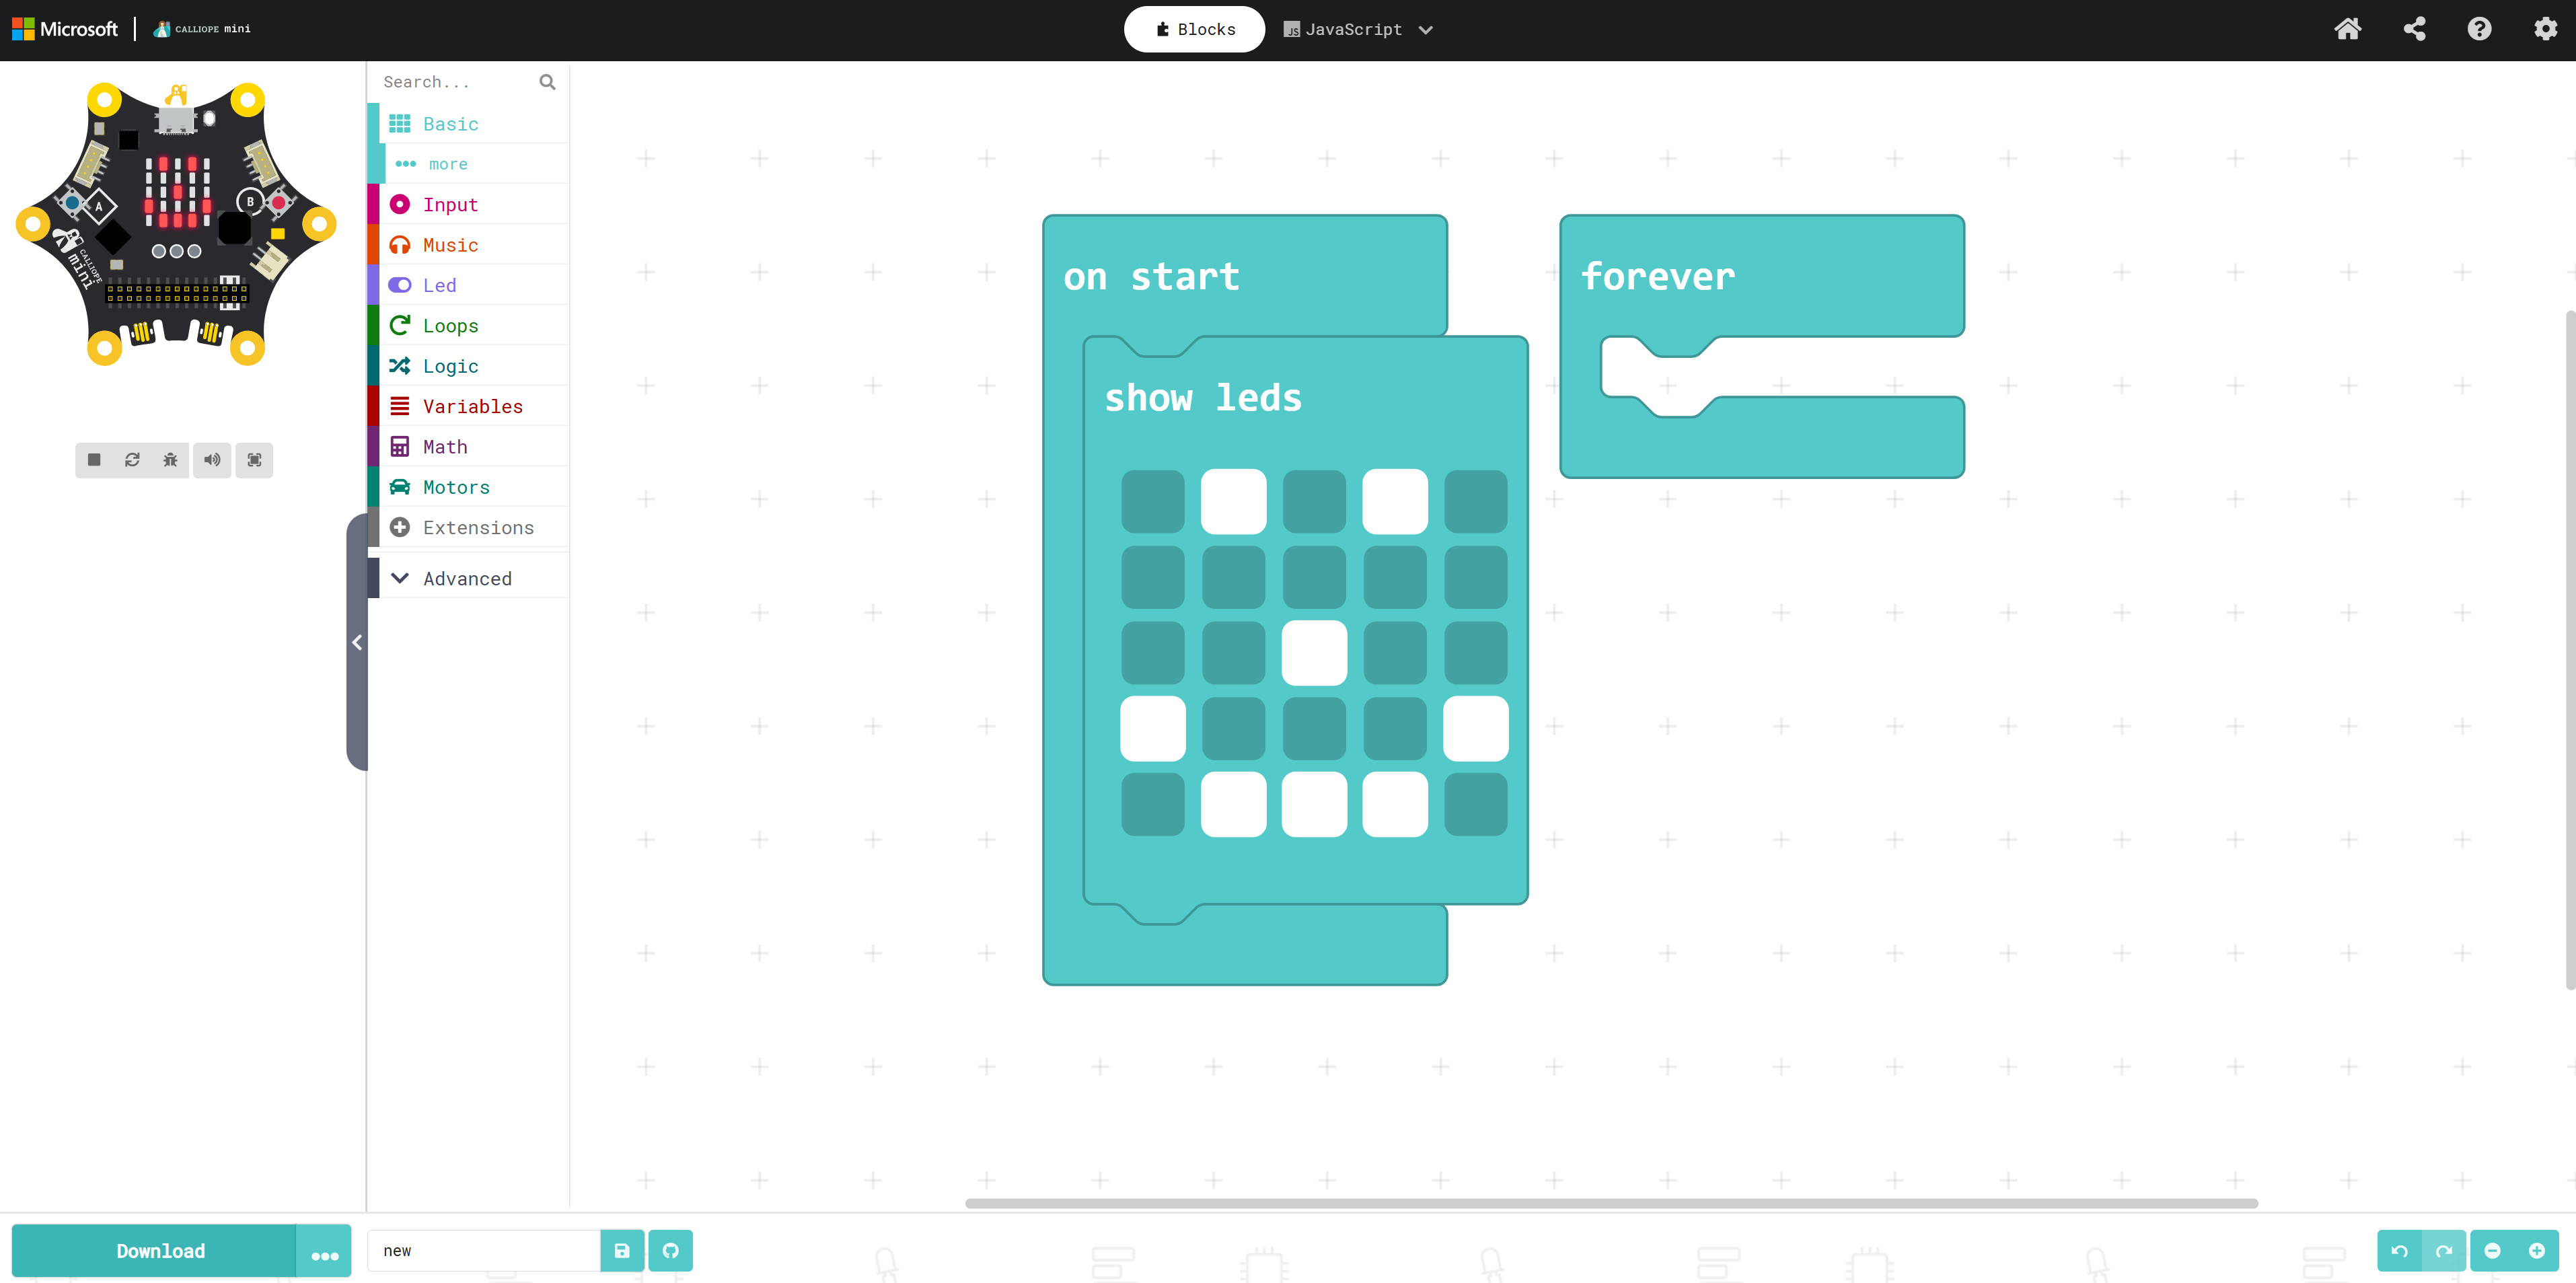
In the “Show LEDs” block, you can click on the individual boxes to set which of the LEDs should be activated. Simply click on the LEDs and create your own “picture”. The clicked boxes turn white and symbolize that the LED is lit. If you have clicked on a box but would rather “turn it off” again, simply click on it a second time. The box will then change from white to blue again and the Calliope's LED will not light up. The following steps explain how you can transfer your program to the Calliope.
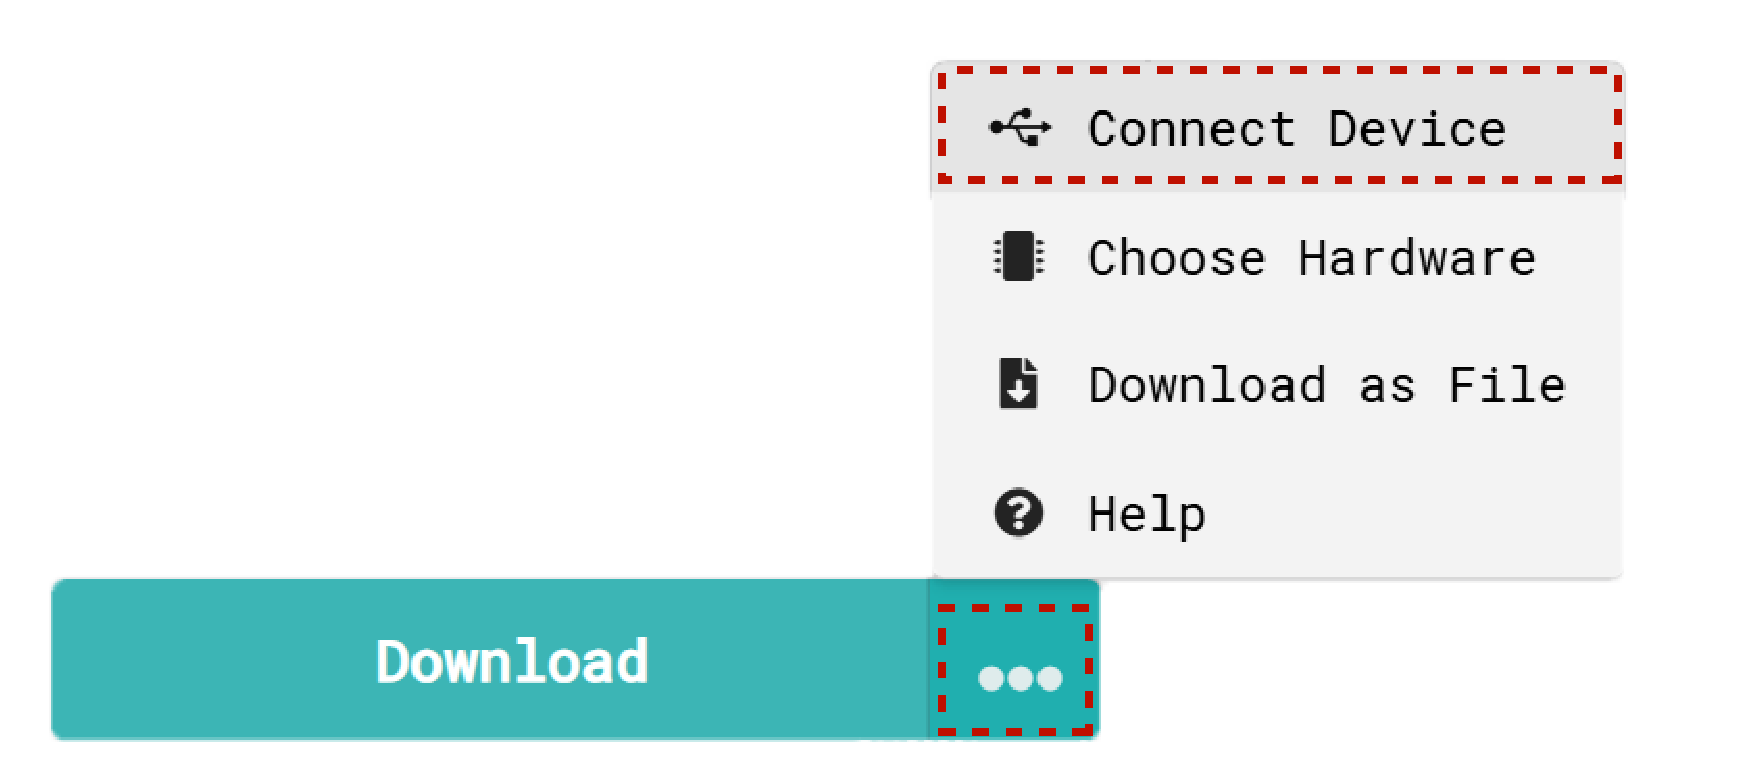
To pair your Calliope, first click on the 3 dots next to the download button and then select “Pair device” in the menu that opens.
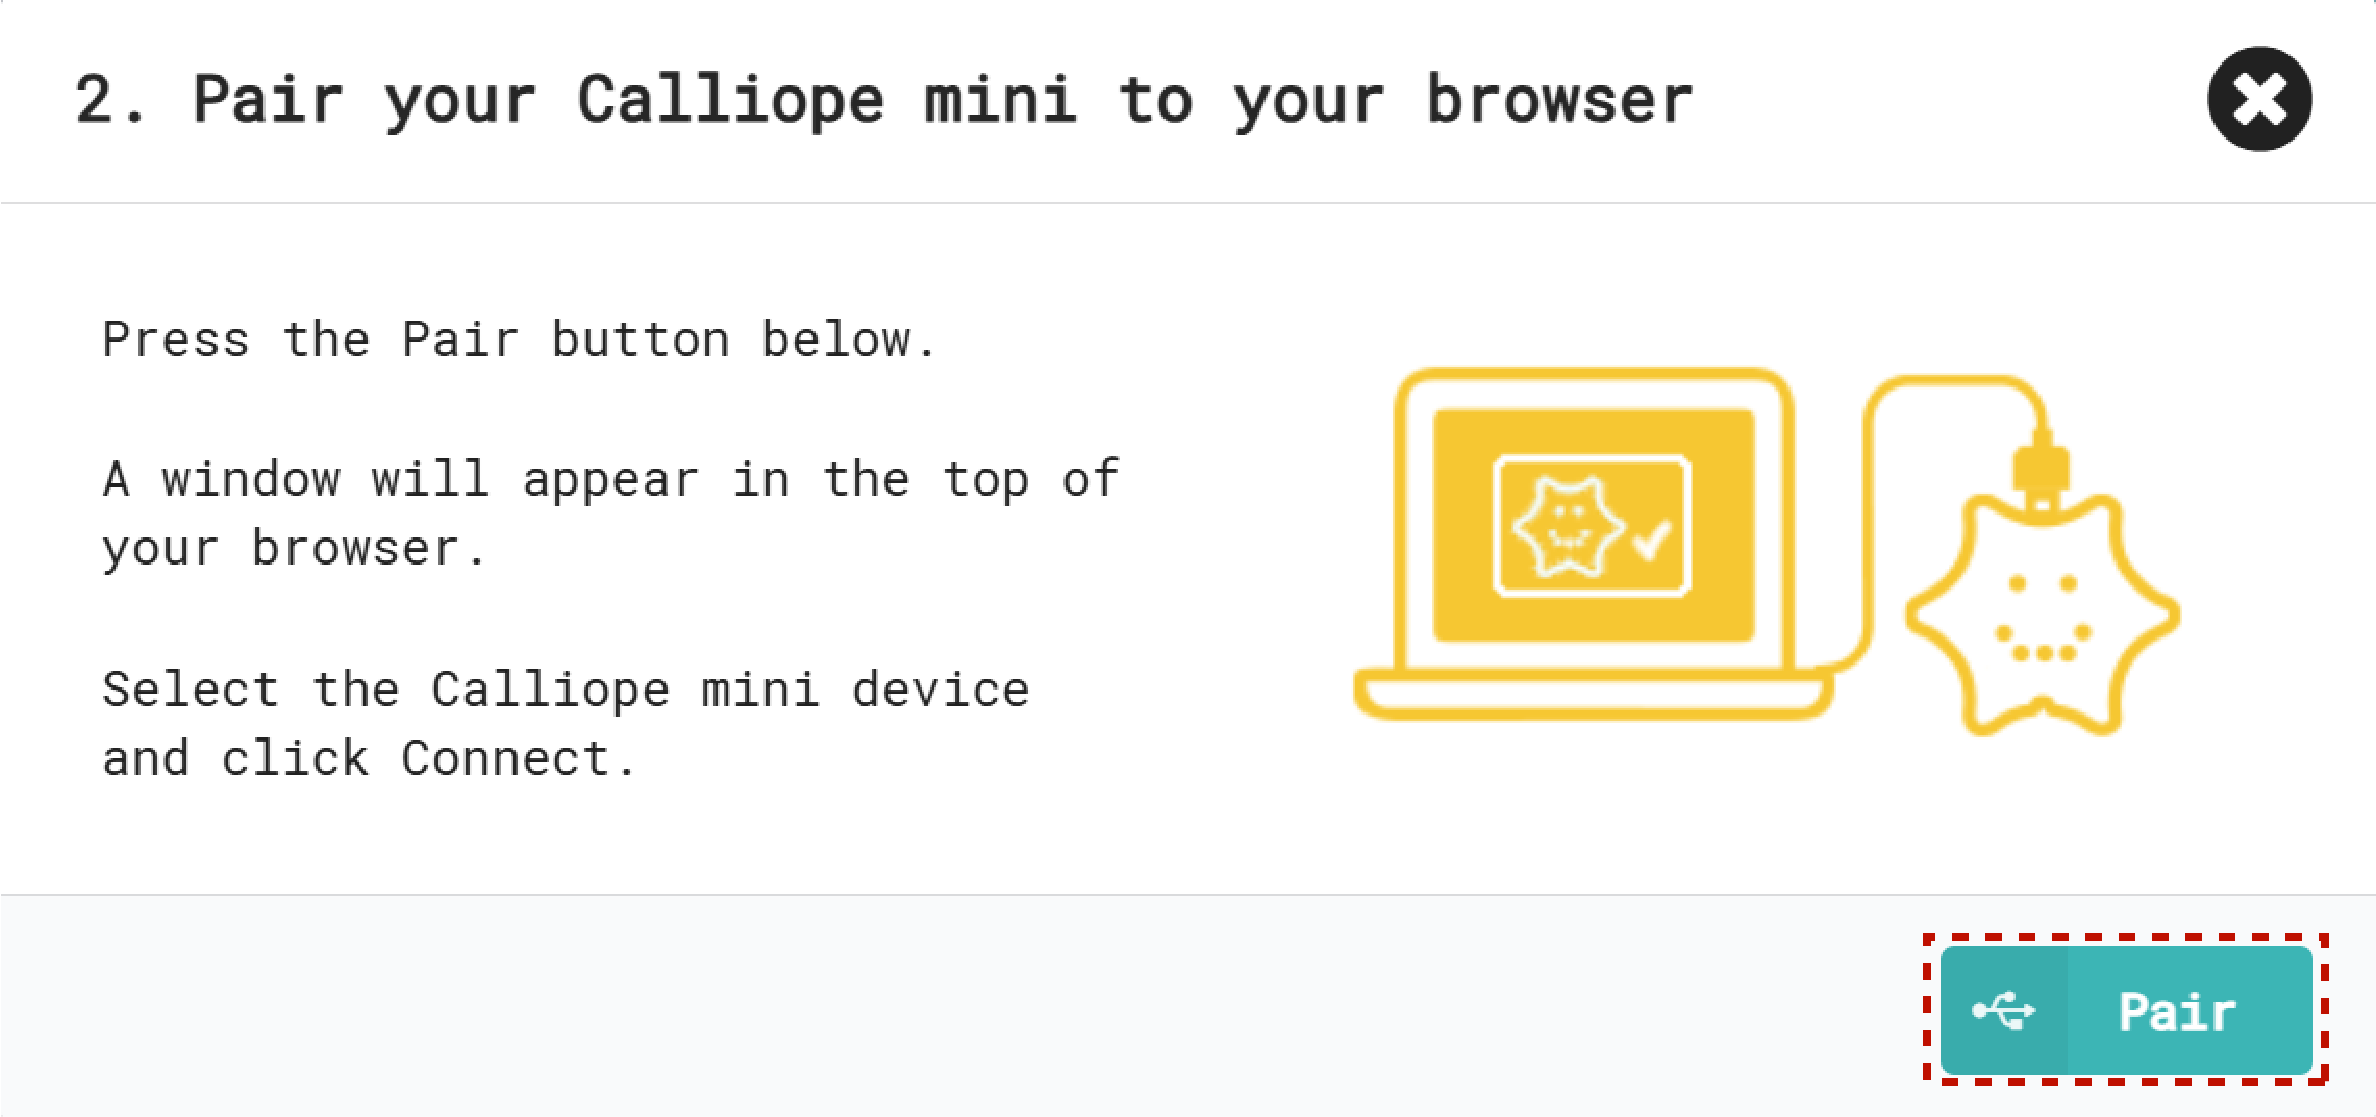
This window also explains once again how to connect your Calliope to your computer correctly. If you have not already done so, connect your Calliope to your computer using a USB cable. Then click on Pair device.
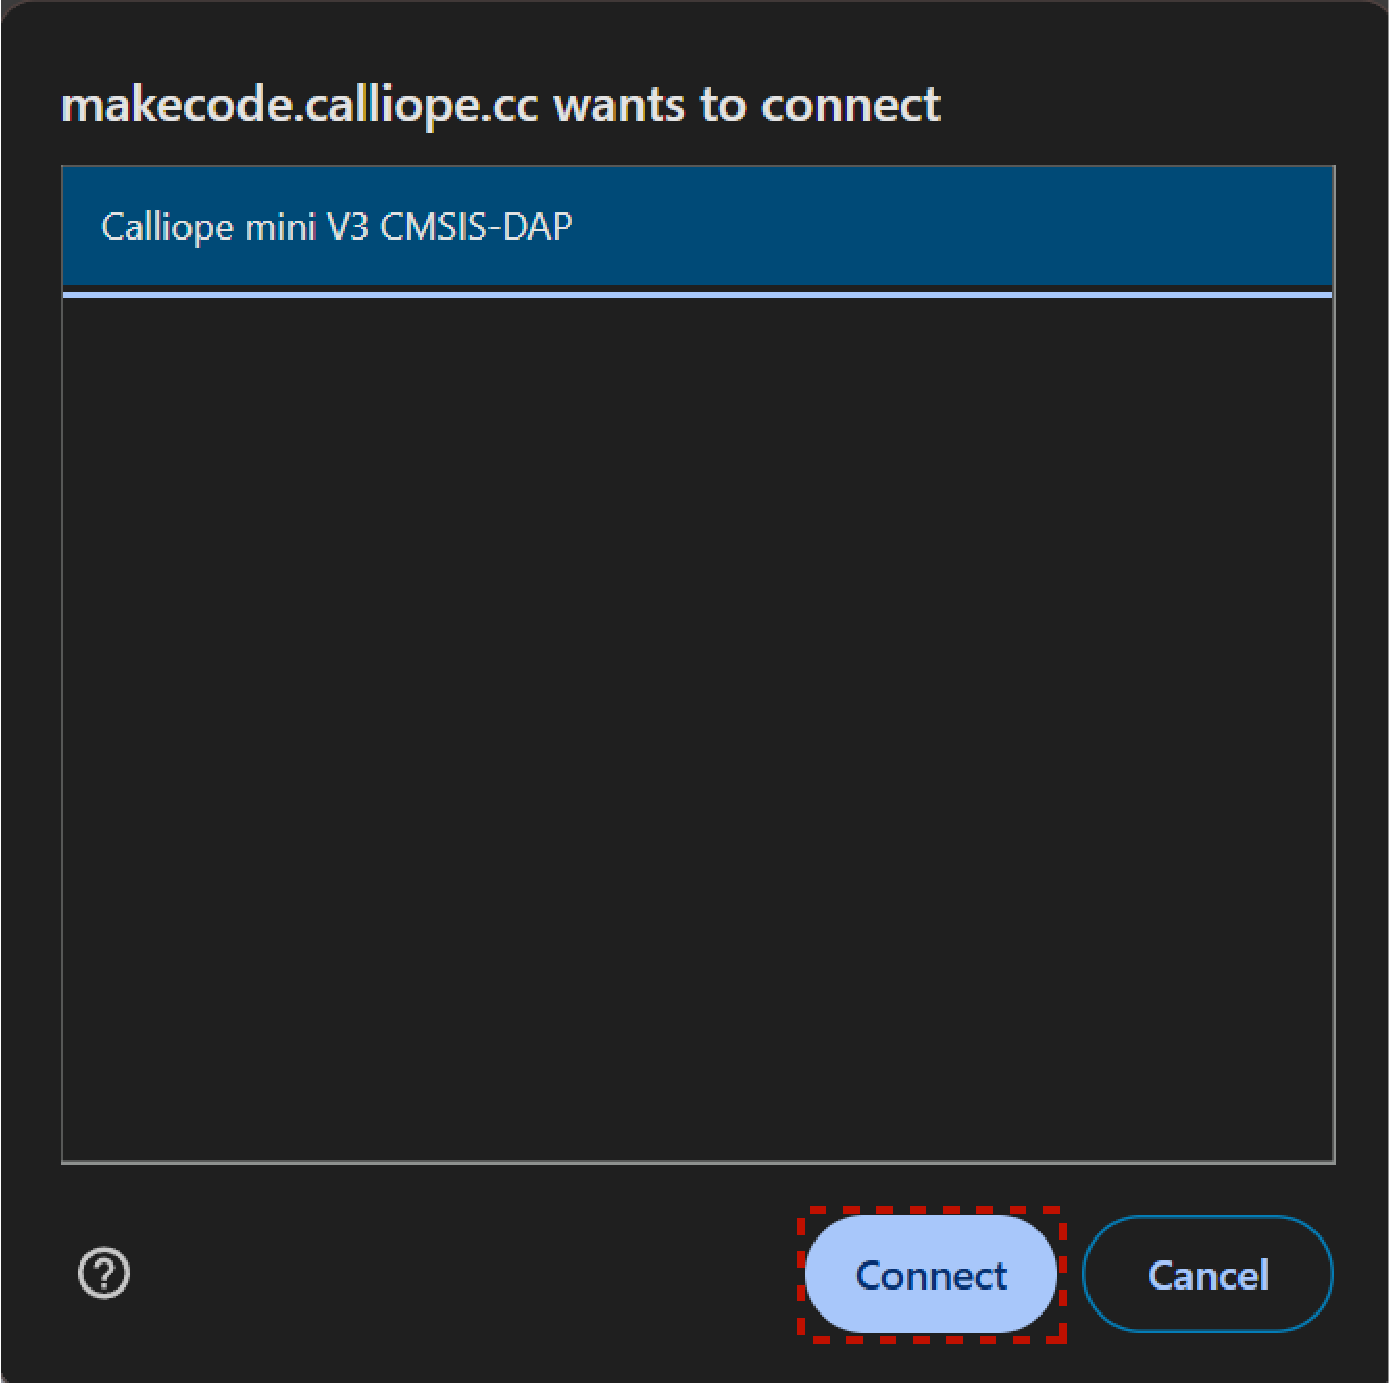
In this window, select your Calliope (in this case “Calliope mini V3 CMSIS-DAP”; but be careful, the name may differ under certain circumstances) and then click on Connect.

If your Calliope is connected to your computer, you will see a USB symbol next to “Download” on the button. If you now click on “Download”, your program will be transferred to the Calliope. The transfer takes a few seconds. The code will then be executed on your Calliope. The code that is on the Calliope will now be executed every time you connect the Calliope to a power source.

If this is not the case, you can save your program as a *.hex file on your PC and edit it later, share it with others or copy it manually to your Calliope.
But that was only the part that is executed once at startup. Now drag the “show text” block and a “pause” block from the basic category into your “permanent” execution block. When the Calliope is started, the image is now first displayed on the LEDs and then the text “Hello world!” is displayed in an endless loop.
You can then change the text and the duration of the pause by simply clicking on the white fields of the blocks. With “Download” you can transfer the code back to your Calliope.
The Joy-Car Extension
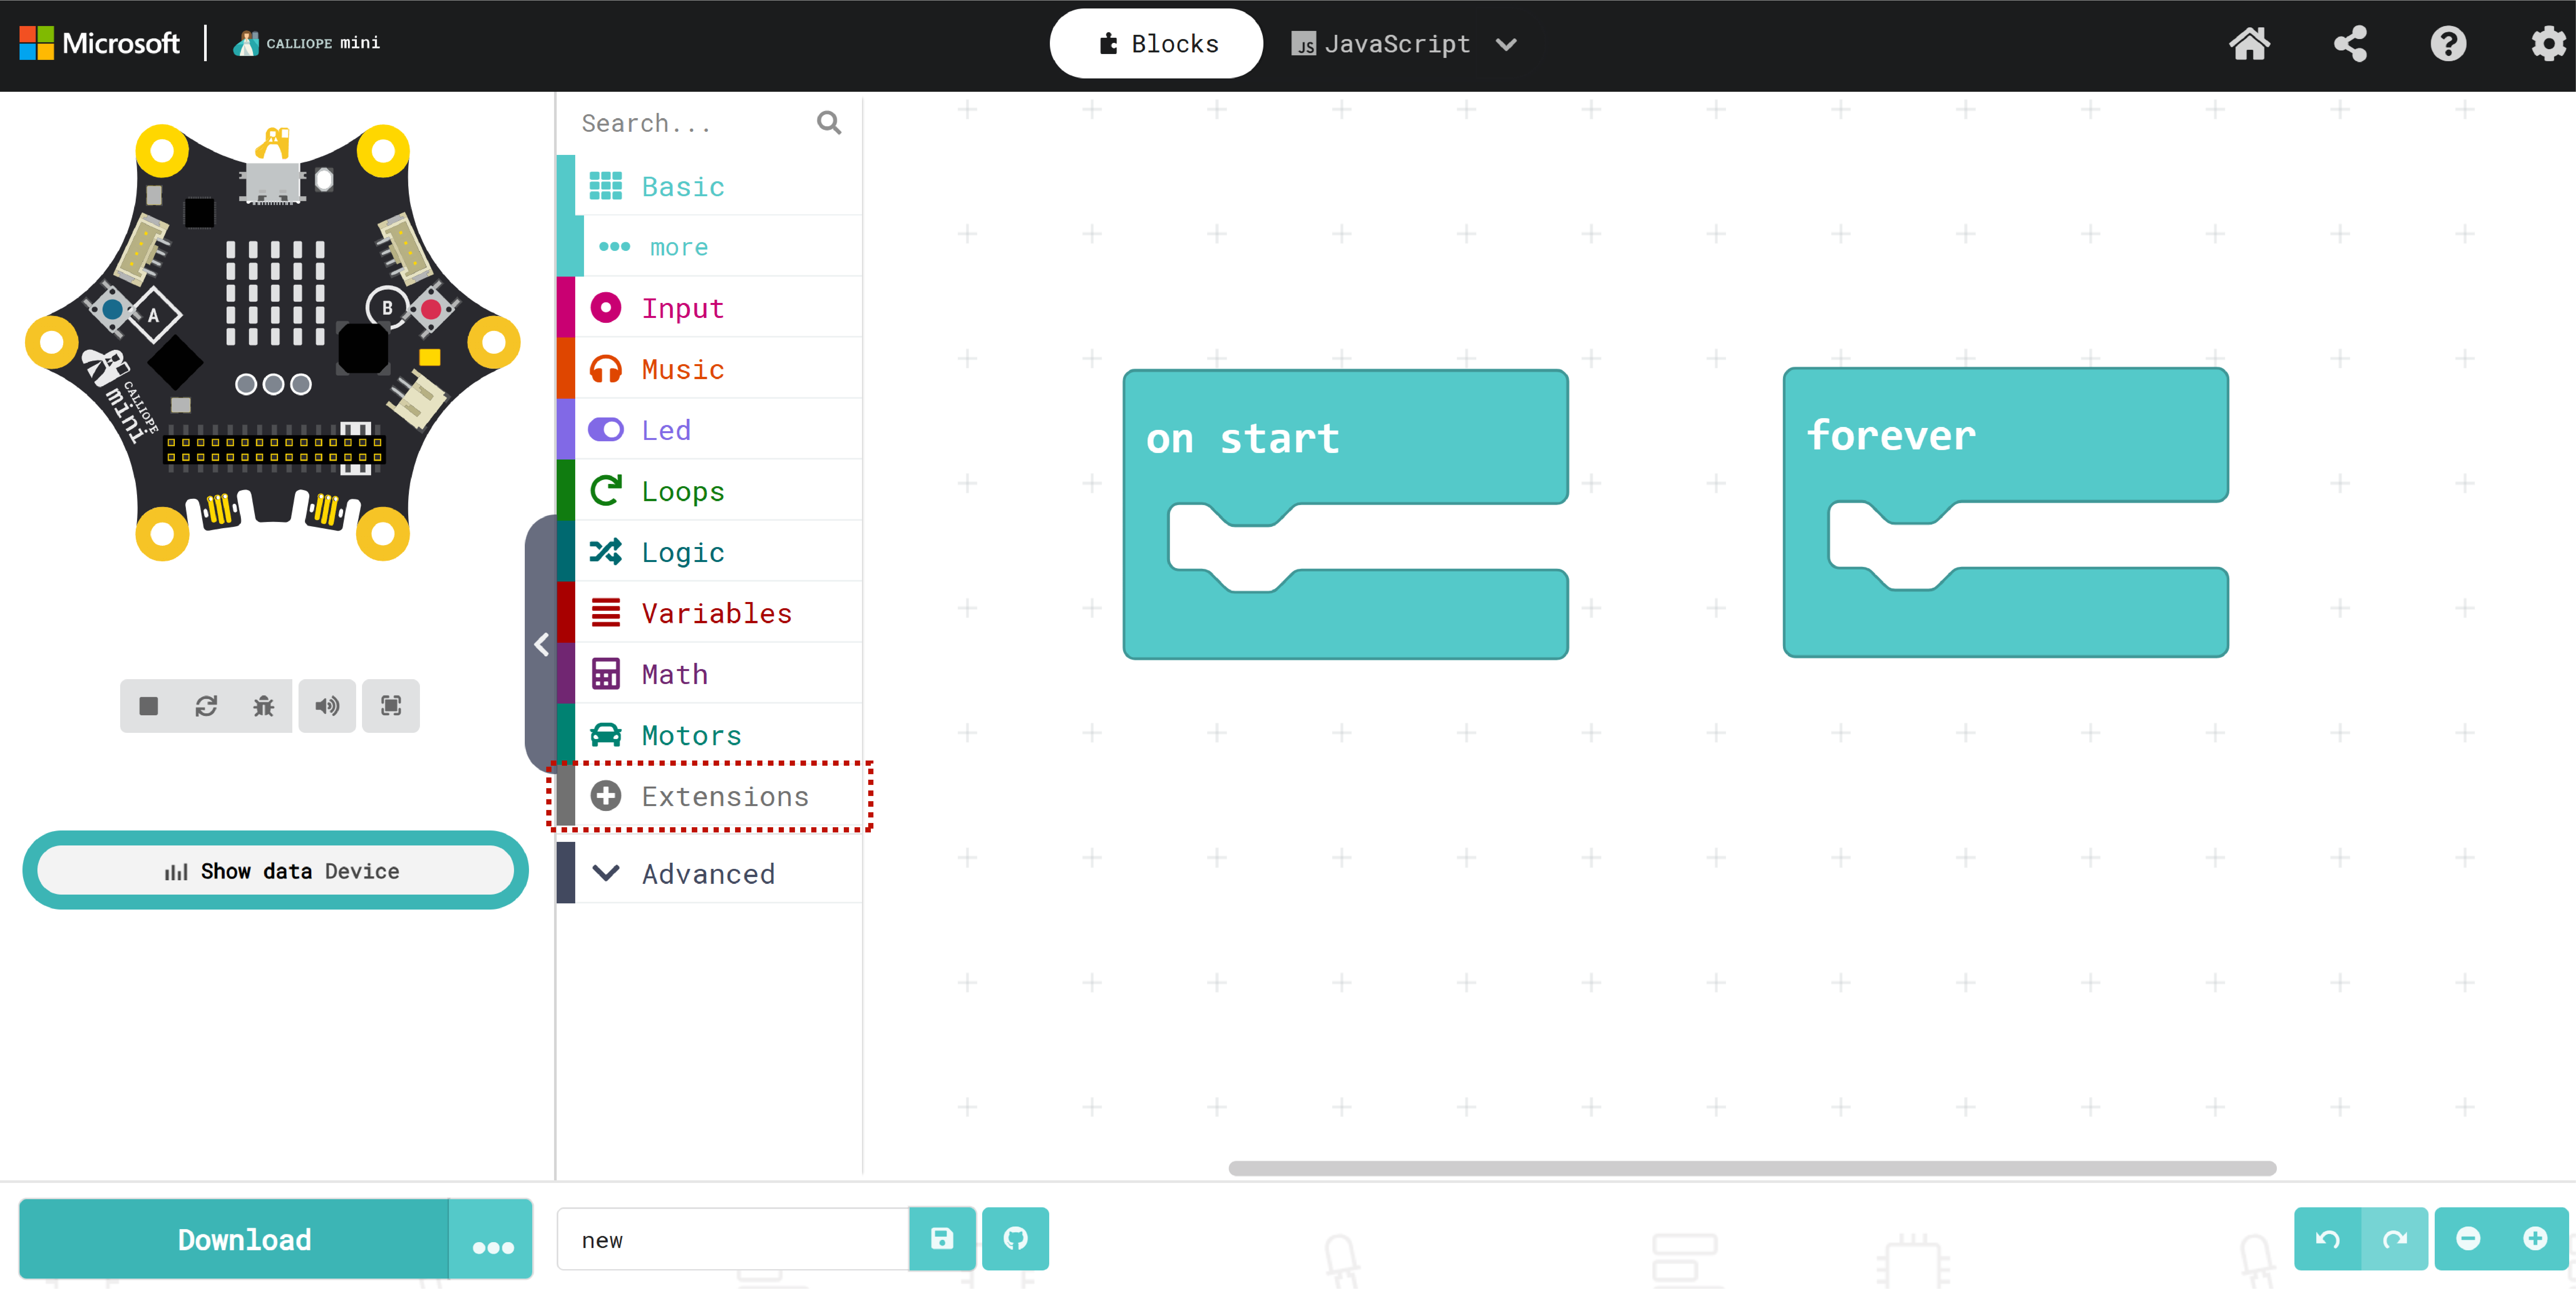
When you create a new project, you must first add the Joy-Car extension to your project so that you can use the Joy-Car functions. We have compiled all the functions of the Joy-Car for you in this extension. To activate this for your project, first open the Extensions tab in your block overview.
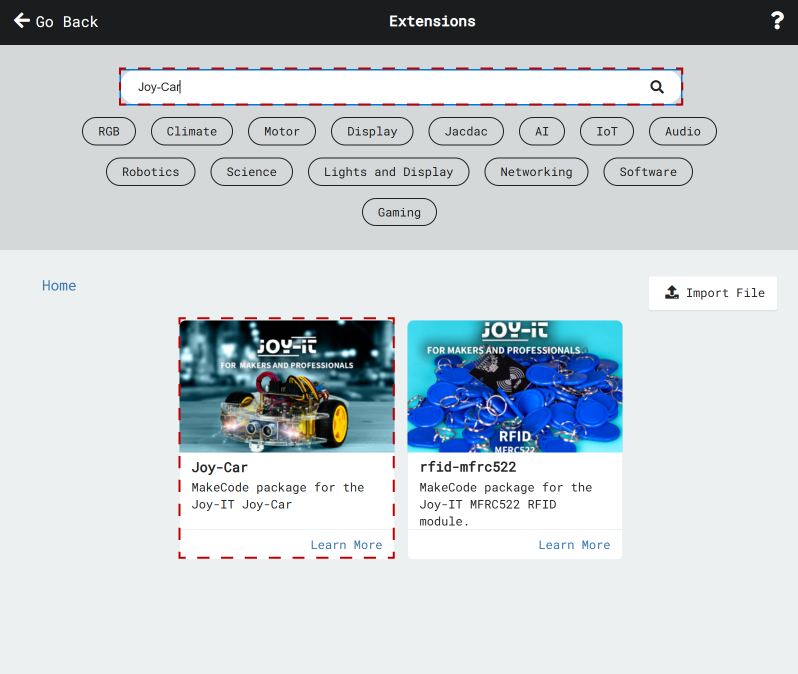
Now search for “Joy-Car” and click on our extension. It will then be automatically added to your project.
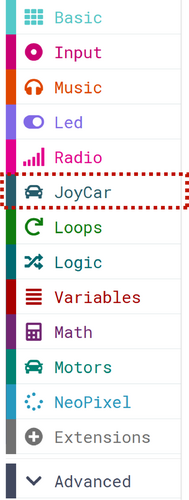
If the Joy-Car extension has been successfully added, it will appear as “JoyCar” in your block menu.
Everything in one place
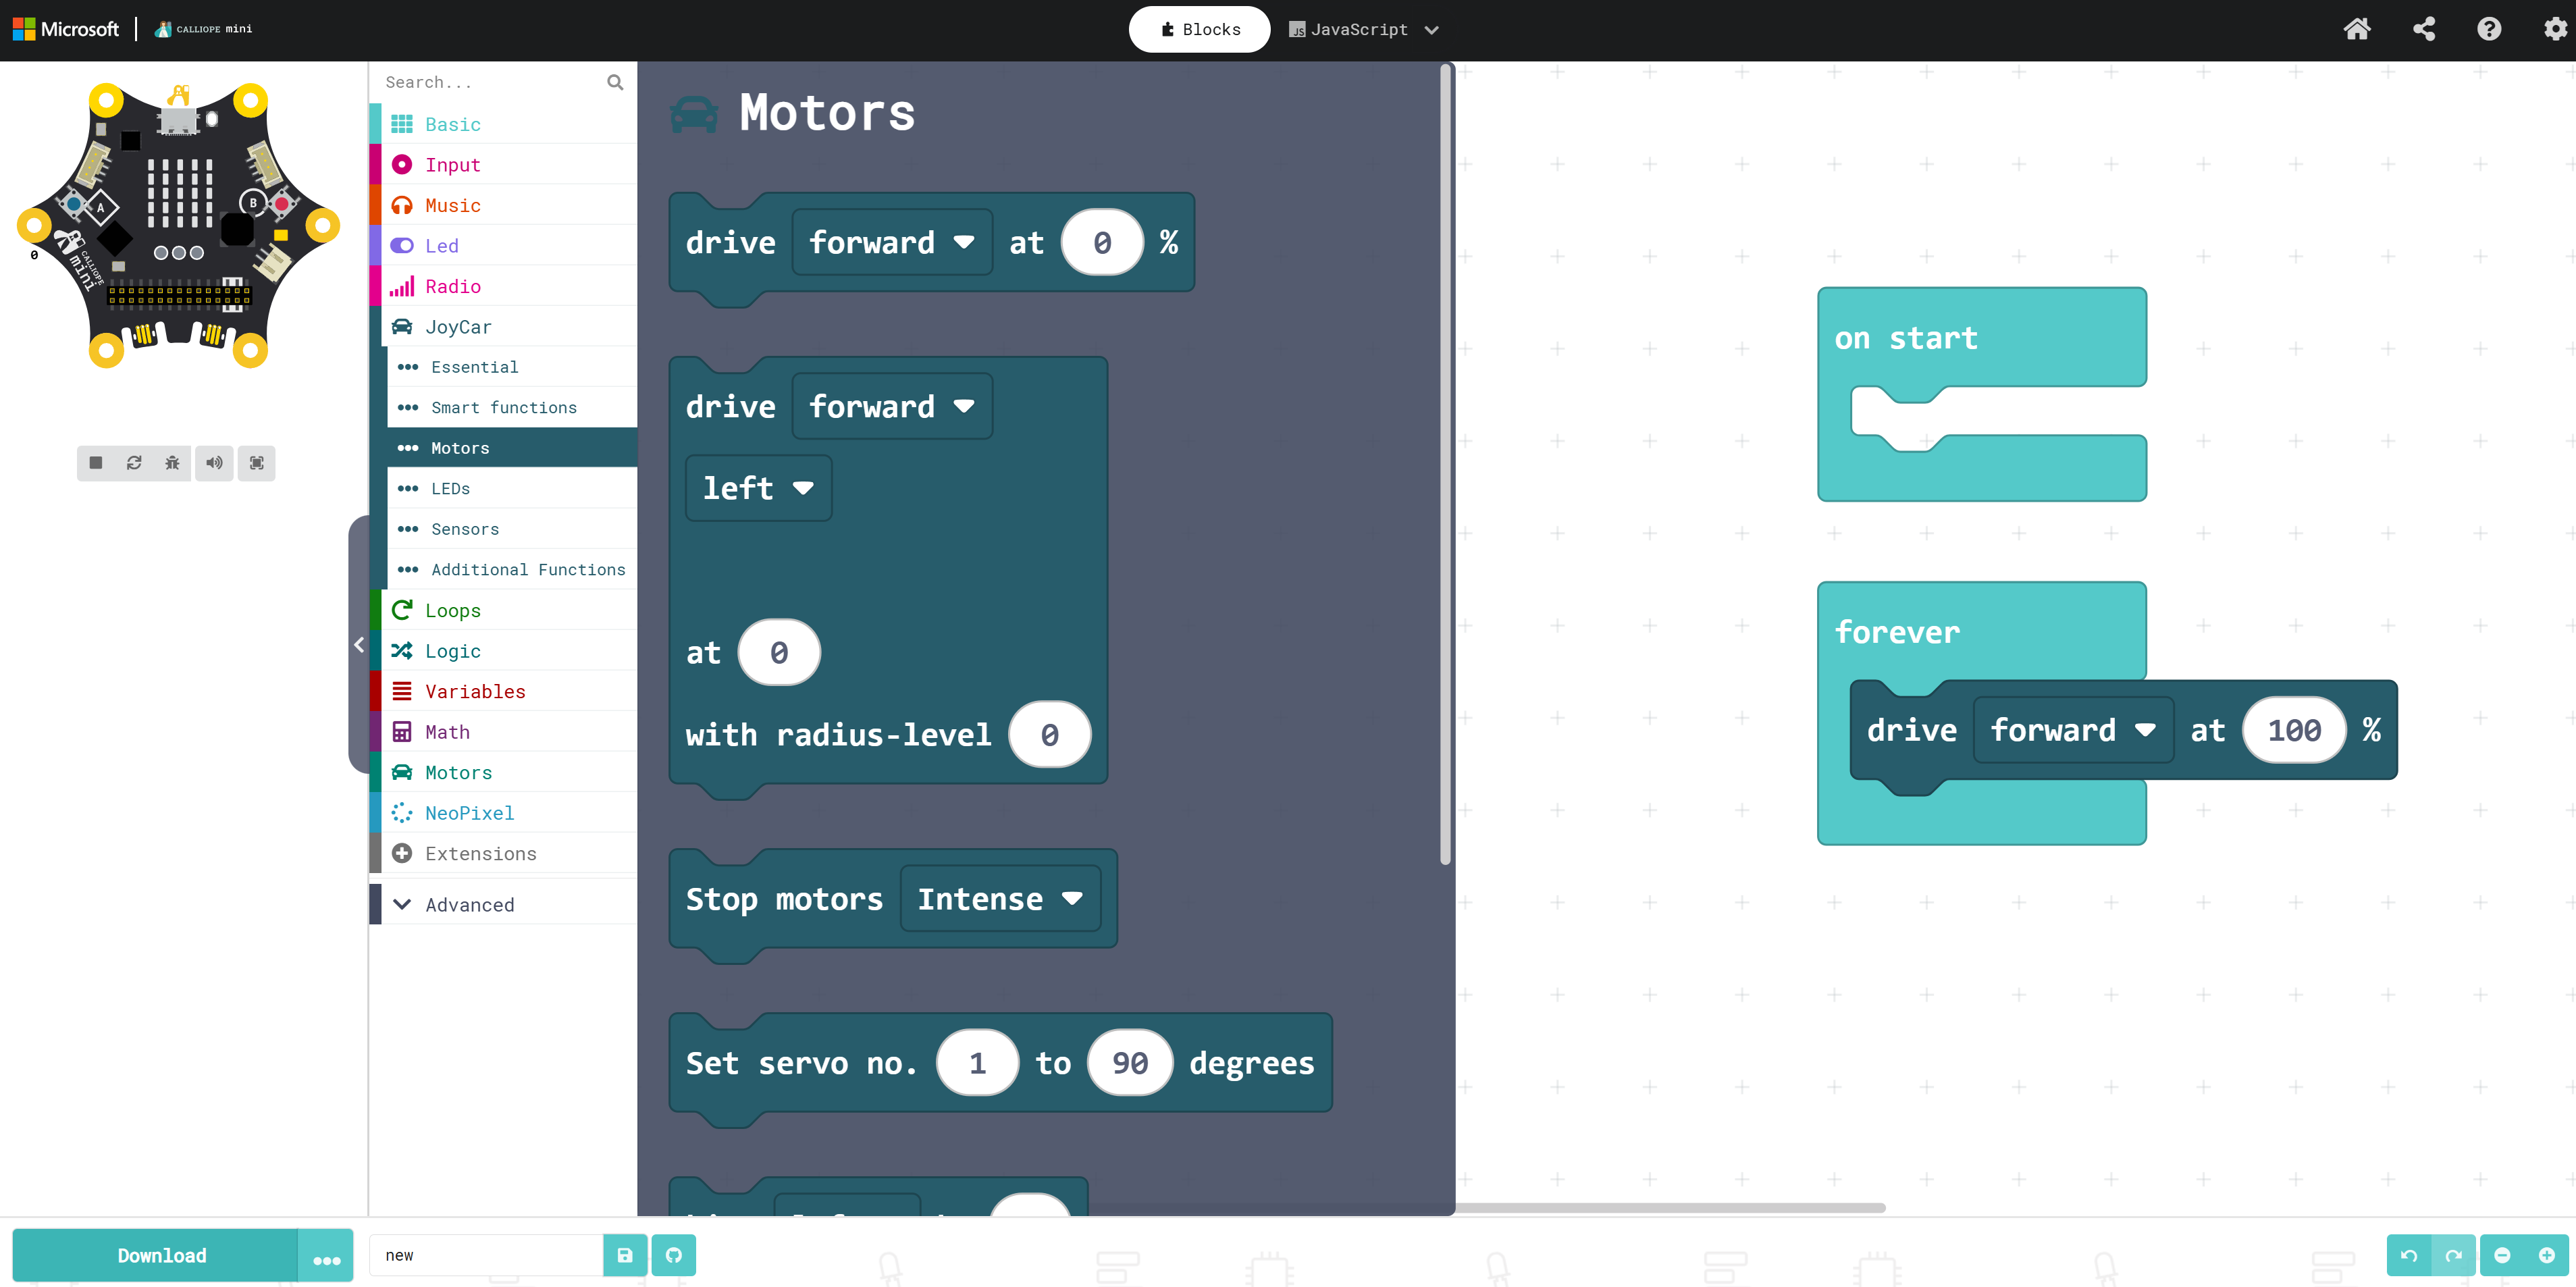
Once you have added the Joy-Car extension to your project via the extension menu, you will find the JoyCar tab in your block overview. All the functionalities of the Joy-Car are combined here so that you can get started straight away. The functions are categorized according to motors, lighting, sensors and other functions. The individual functions should be easy to understand.
After installing the extension, you can simply drag any block from the overview into your program. For example, you can make your Joy-Car drive forwards with just a single block instruction. The blocks of the Joy-Car extension give you access to all the functions of your Joy-Car. This allows you to customize your blocks and your entire programming.
Copying the sample codes
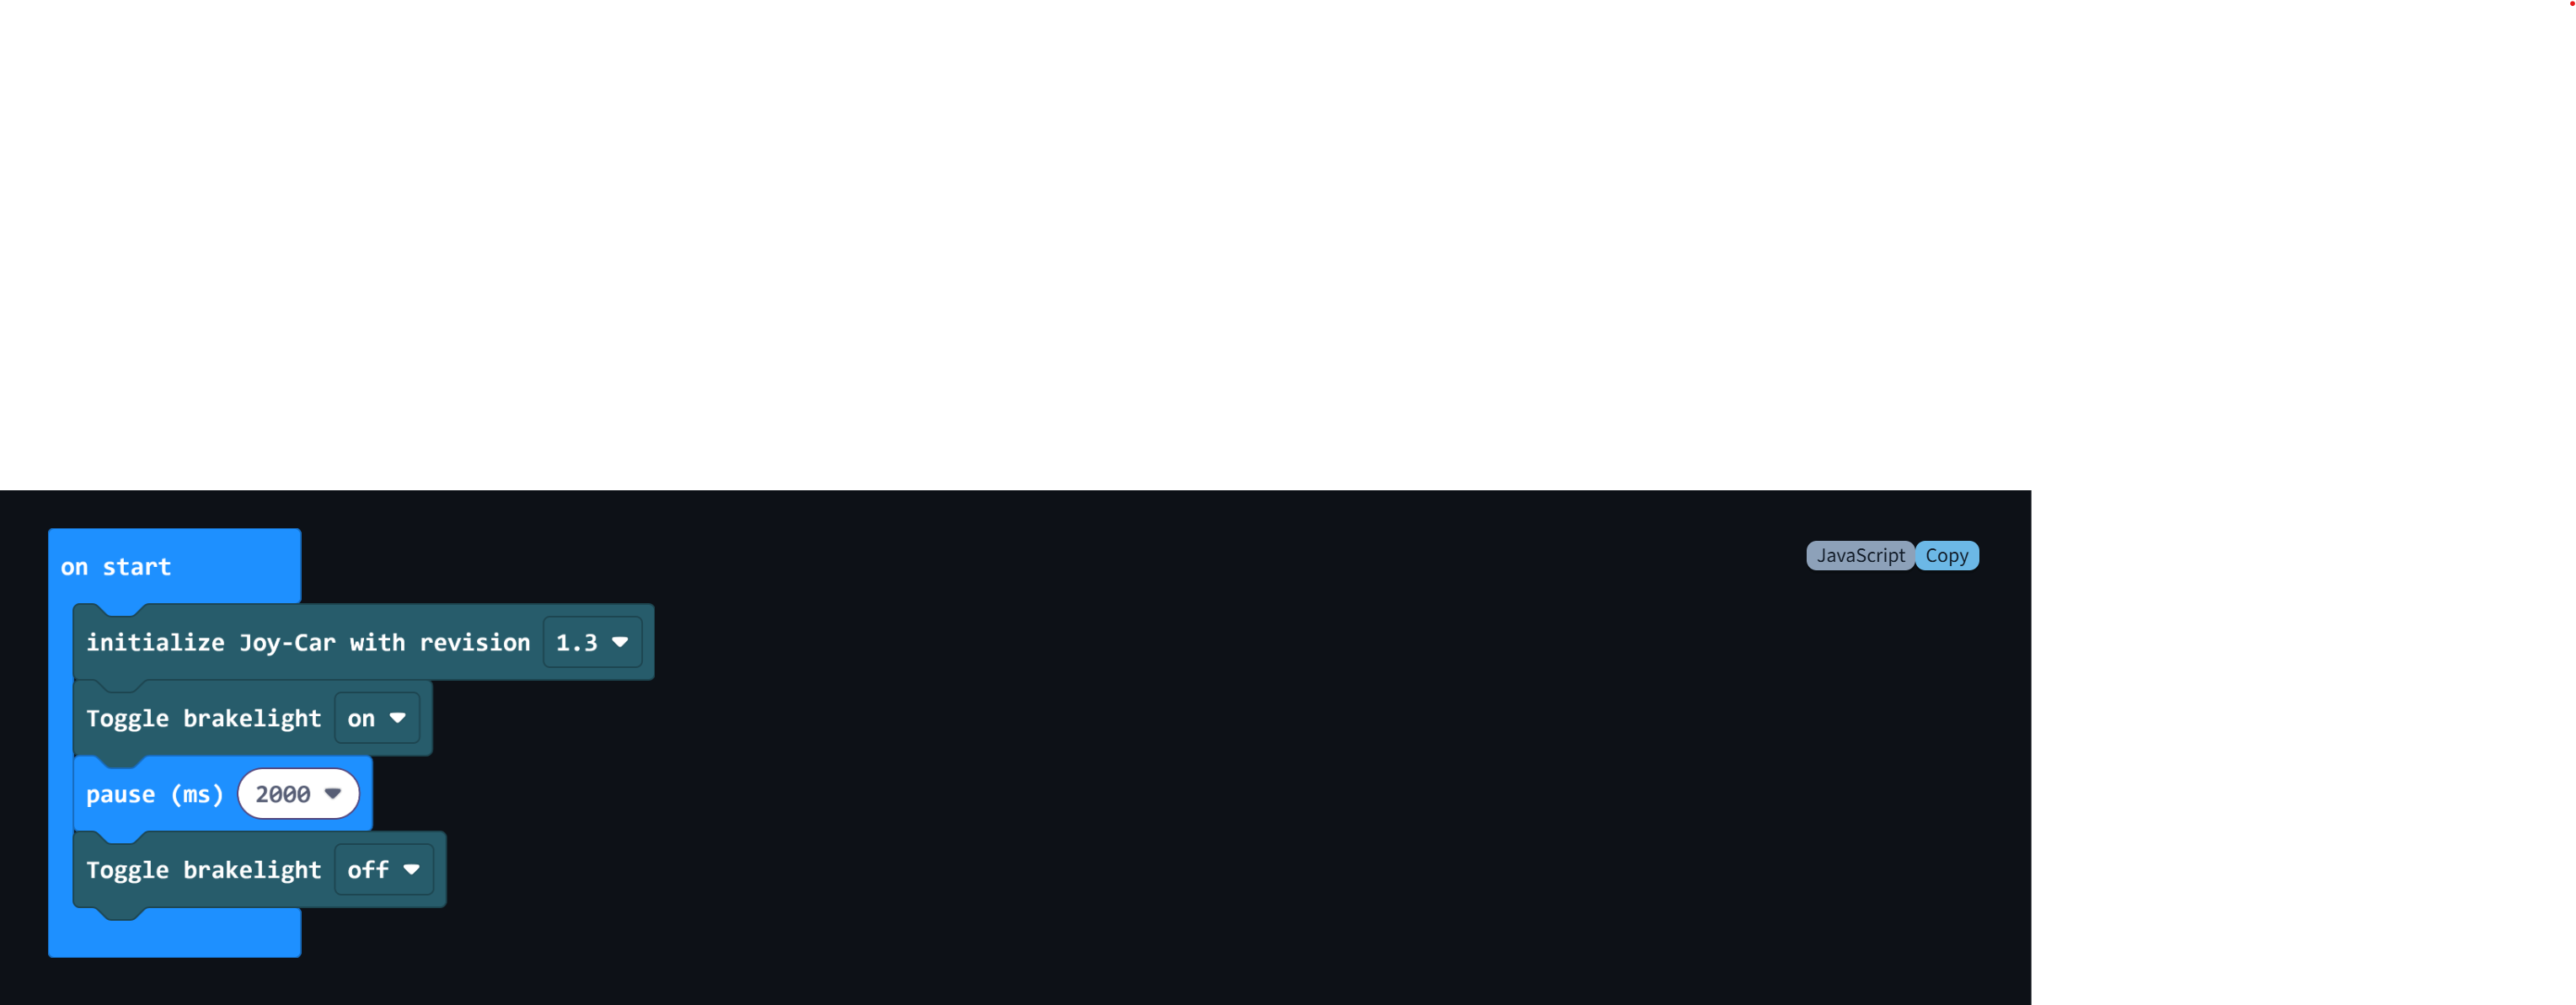
Our sample codes are designed so that they can simply be copied using a button. This makes it easier for you to copy the code quickly and efficiently and use it in your own project. The copying process is made possible by JavaScript, which is integrated into the corresponding area of MakeCode.
If you want to select a sample code, simply click on the “Copy” button next to the code. This click will automatically copy the code to your clipboard. You can then paste the copied code into the JavaScript area of MakeCode. This allows you to execute the code immediately or customize it further to meet your specific requirements.

Define Calliope in MakeCode
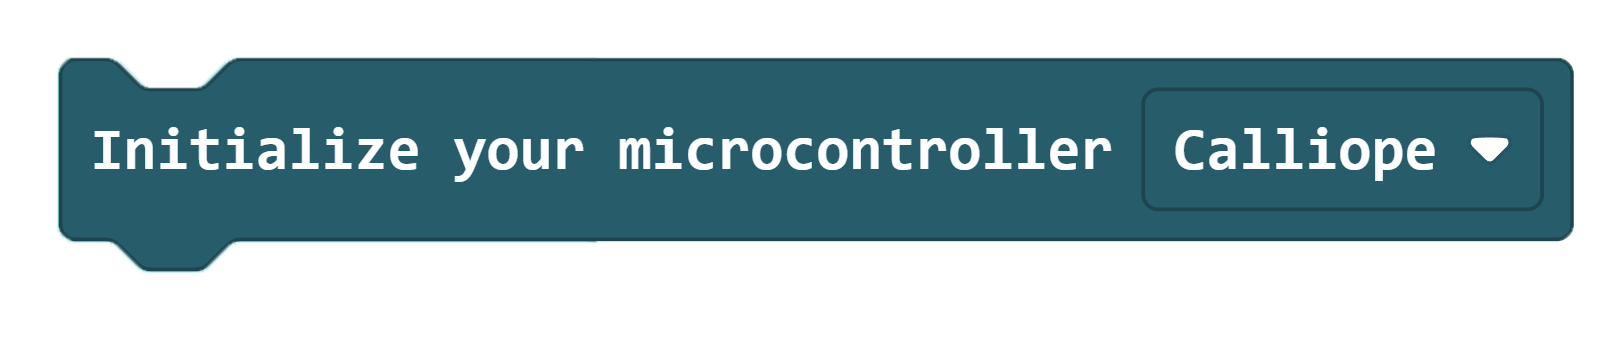
In the Essential section of the MakeCode library, you will find the option to select the Calliope as the used microcontroller. This setting is necessary as there are differences in the pin assignment between micro:bit and Calliope. With this selection, all necessary adjustments are made automatically so that you can use the Joy-Car completely with the Calliope mini 3.0 and all functions such as motor control and sensors work correctly.