MicroPython Installation
Development environment
MicroPython is an implementation based on the Python 3 language. It was written in the C programming language and is optimized for use on microcontrollers, such as the micro:bit. Users who are already familiar with the basics of software programming can start directly with this variant.
Without previous experience in programming, however, it is recommended to start with the Make:Code variant from the previous chapter.
MicroPython can be compiled with the Mu Editor. This editor is aimed primarily at beginners and is therefore particularly easy to use.
The editor can be downloaded here:
Einrichtung
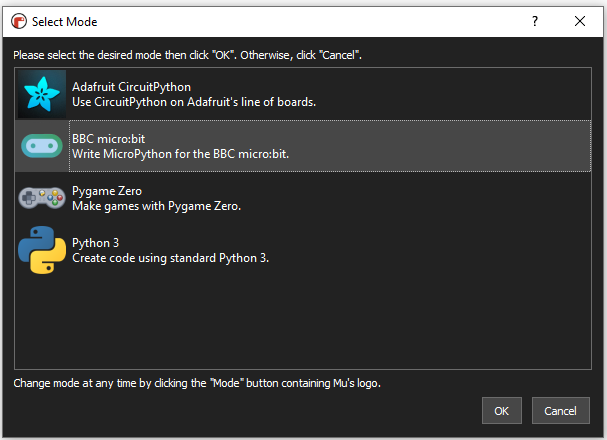
When starting the Mu-Editor for the first time, it is first necessary to select the desired mode.
Select BBC MICRO:BIT here and confirm the selection with OK.
The detailed English MicroPython documentation can offer additional help and can be found here.
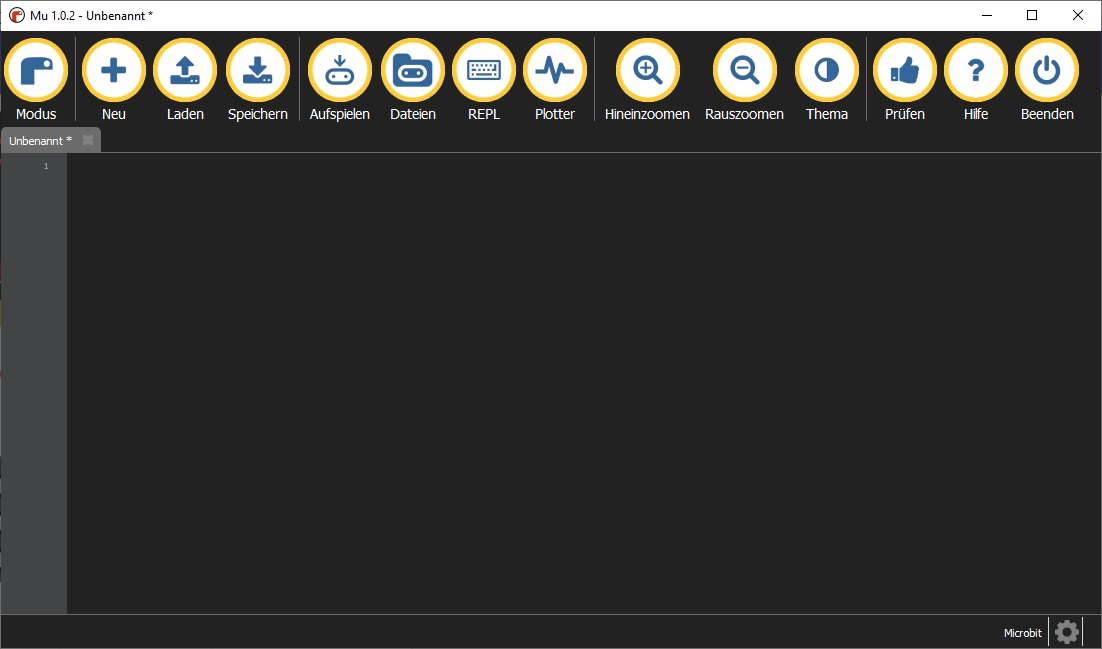
The most important options and possibilities of the editor interface are explained in the next steps.
REPL
REPL stands for READ-EVAL-PRINT-LOOP and represents the console in the Mu-Editor.
Here output can be displayed during code execution and own commands can be sent to the micro:bit.
Additionally, there are key combinations which can be used for control within the REPL:
STRG + D: Soft reboot
STRG + C: Stop code execution
Check

With this, the written source code can be checked. Errors are automatically detected and displayed accordingly.
Flash
The written source code is finally checked, compiled for the micro:bit and then transferred to the device.
The first launch
You have no experience with the Mu development environment yet, but would like to start with a small example? We bring the environment closer to you!
After starting the development environment, you start directly with an empty project. From here you can start right away!
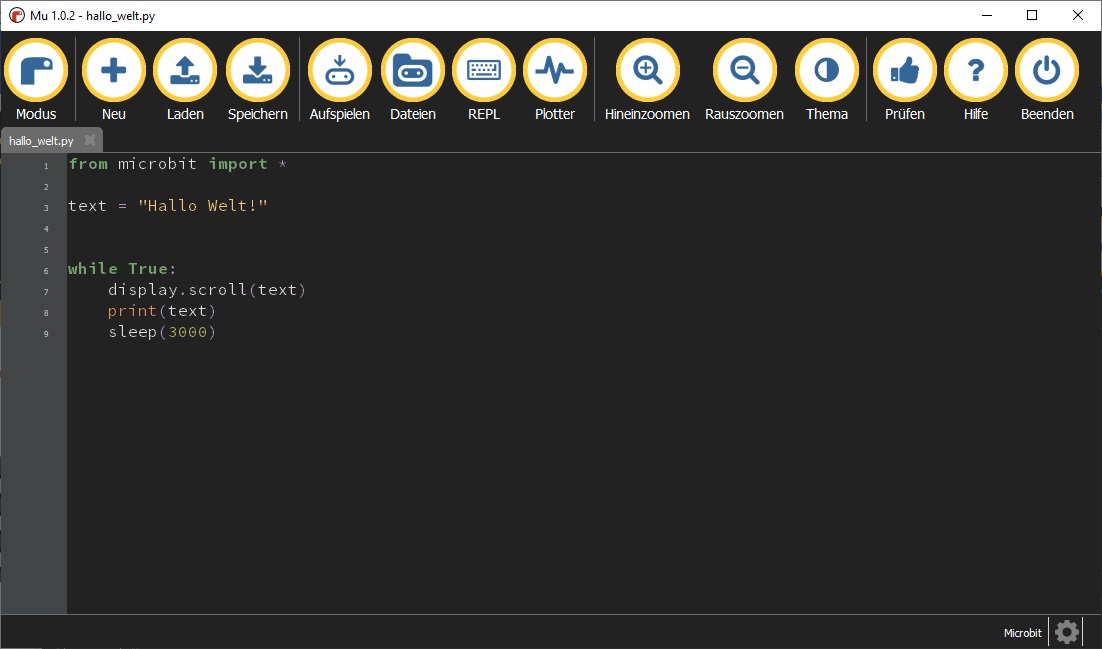
It is best to start with a simple test.
Take the example from the picture. The text "Hello World!" will be displayed on the LED matrix of your Micro:Bit and the console.
Insert your code here.
When you are done, click on Load to transfer the code to your connected Micro:Bit.
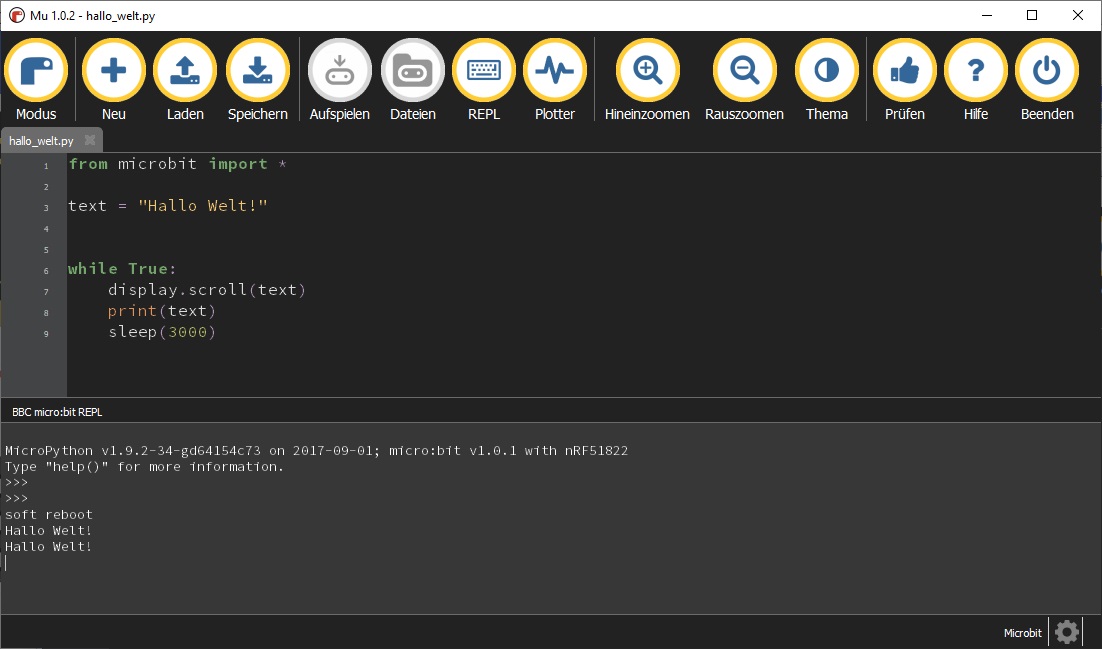
After you click on Flash, the code is immediately transferred to your Micro:Bit and started automatically.
You should then see the output of the text both in the console and on the LED matrix of your Micro:Bit.
From here all possibilities are open to you! Please have a look at our sample files, which we have compiled for you in the next chapters.