MakeCode LED
Lighting functions
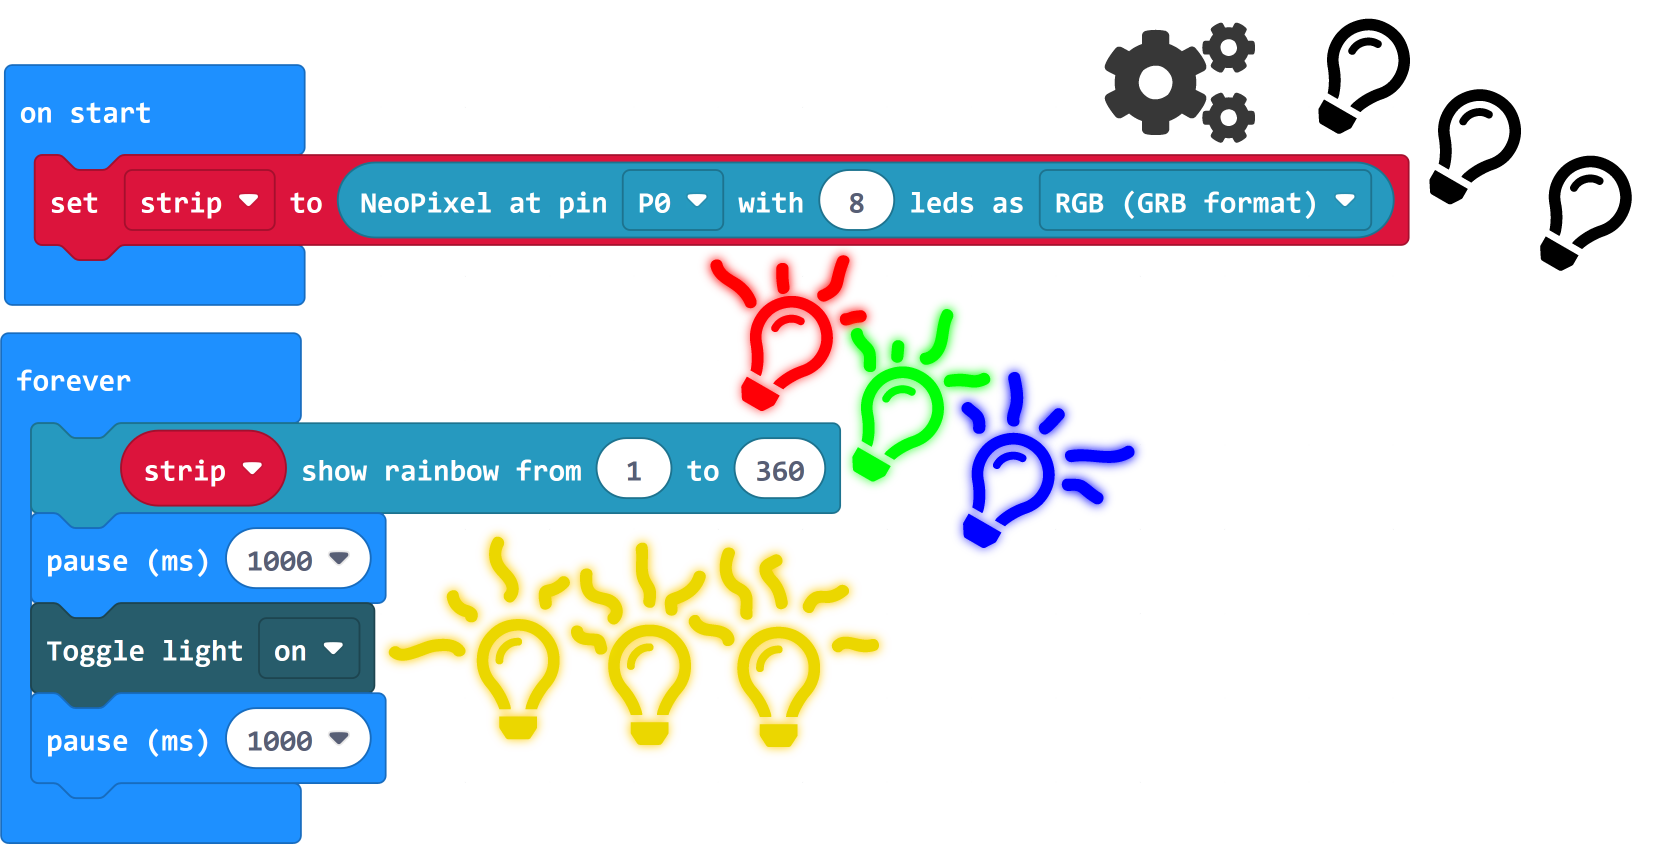
The Joy-Car with its 4 LED boards has a total of 8 LED units which can be controlled individually. So the corresponding light signals can either be sent directly via the functions of the Joy-Car extension or into the additionally integrated NeoPixel library.
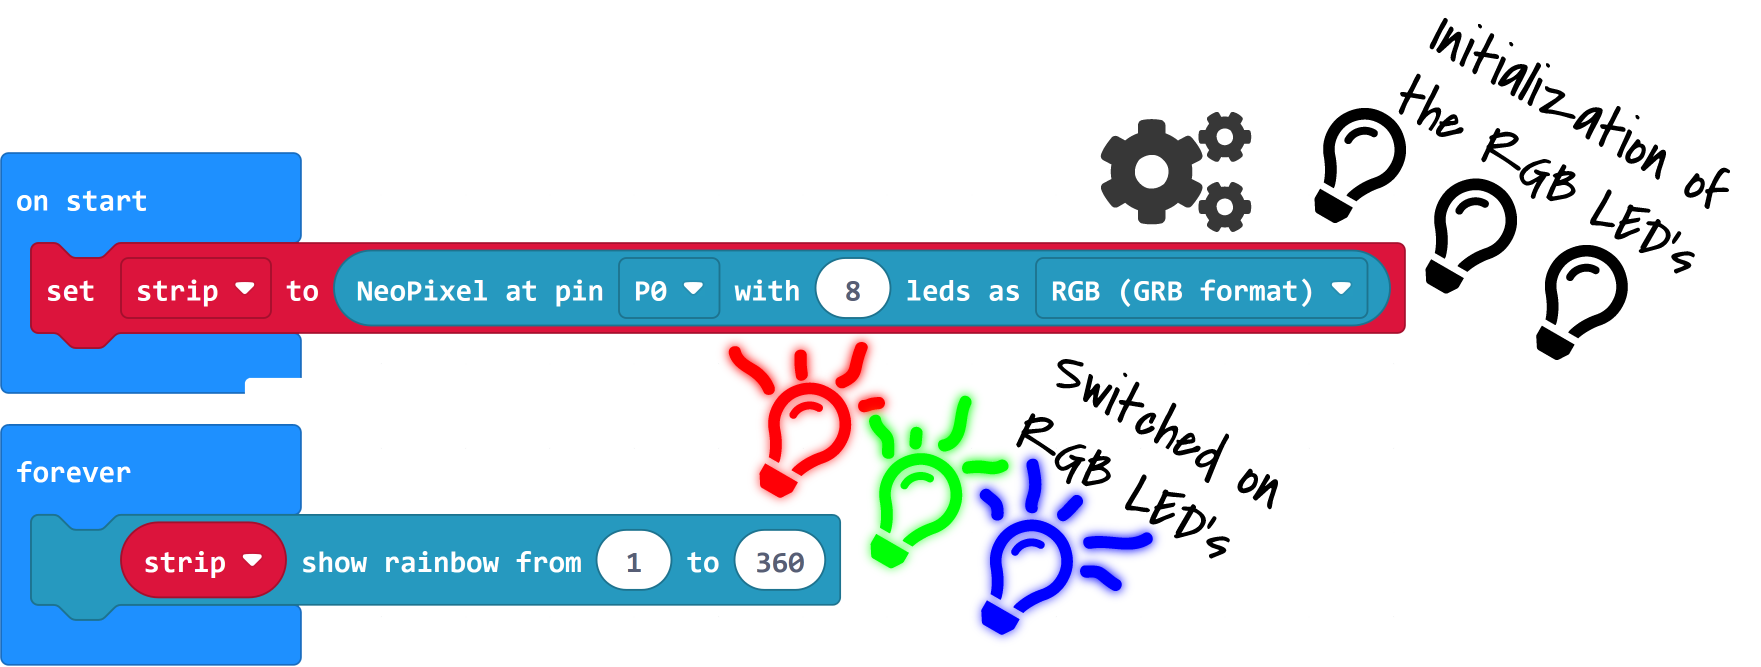
When using the NeoPixel-Library the LED modules must be initialized first. For this purpose, the "neopixel.create(...)" block is added to the start instruction. This function additionally needs the information to which pin the LED modules are connected, how many LEDs are involved and in which illumination mode they should be set. In our case we use the digital pin P0, 8 LED units and the RGB color mode.
In the following example we use "strip.showRainbow(...)" to instruct the LEDs to display a rainbow effect in color.
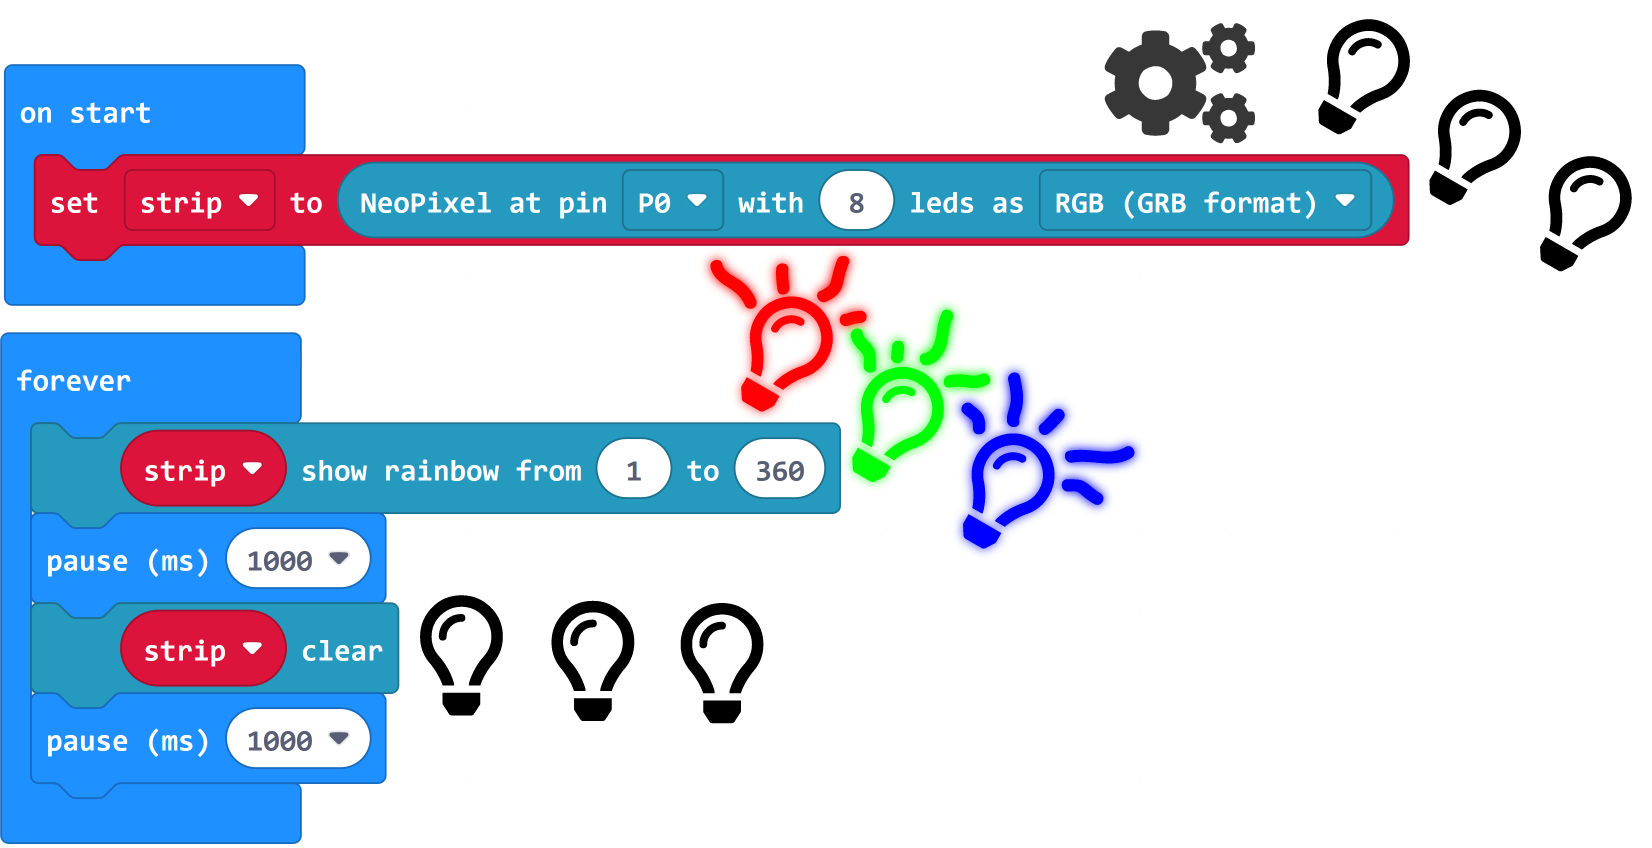
However, the LEDs do not have to remain permanently in their assigned function. In the next example we want to switch between the rainbow function and the switched off LEDs every second.
Note: Don't be surprised if you don't notice any change with this example. In the next step the solution follows!
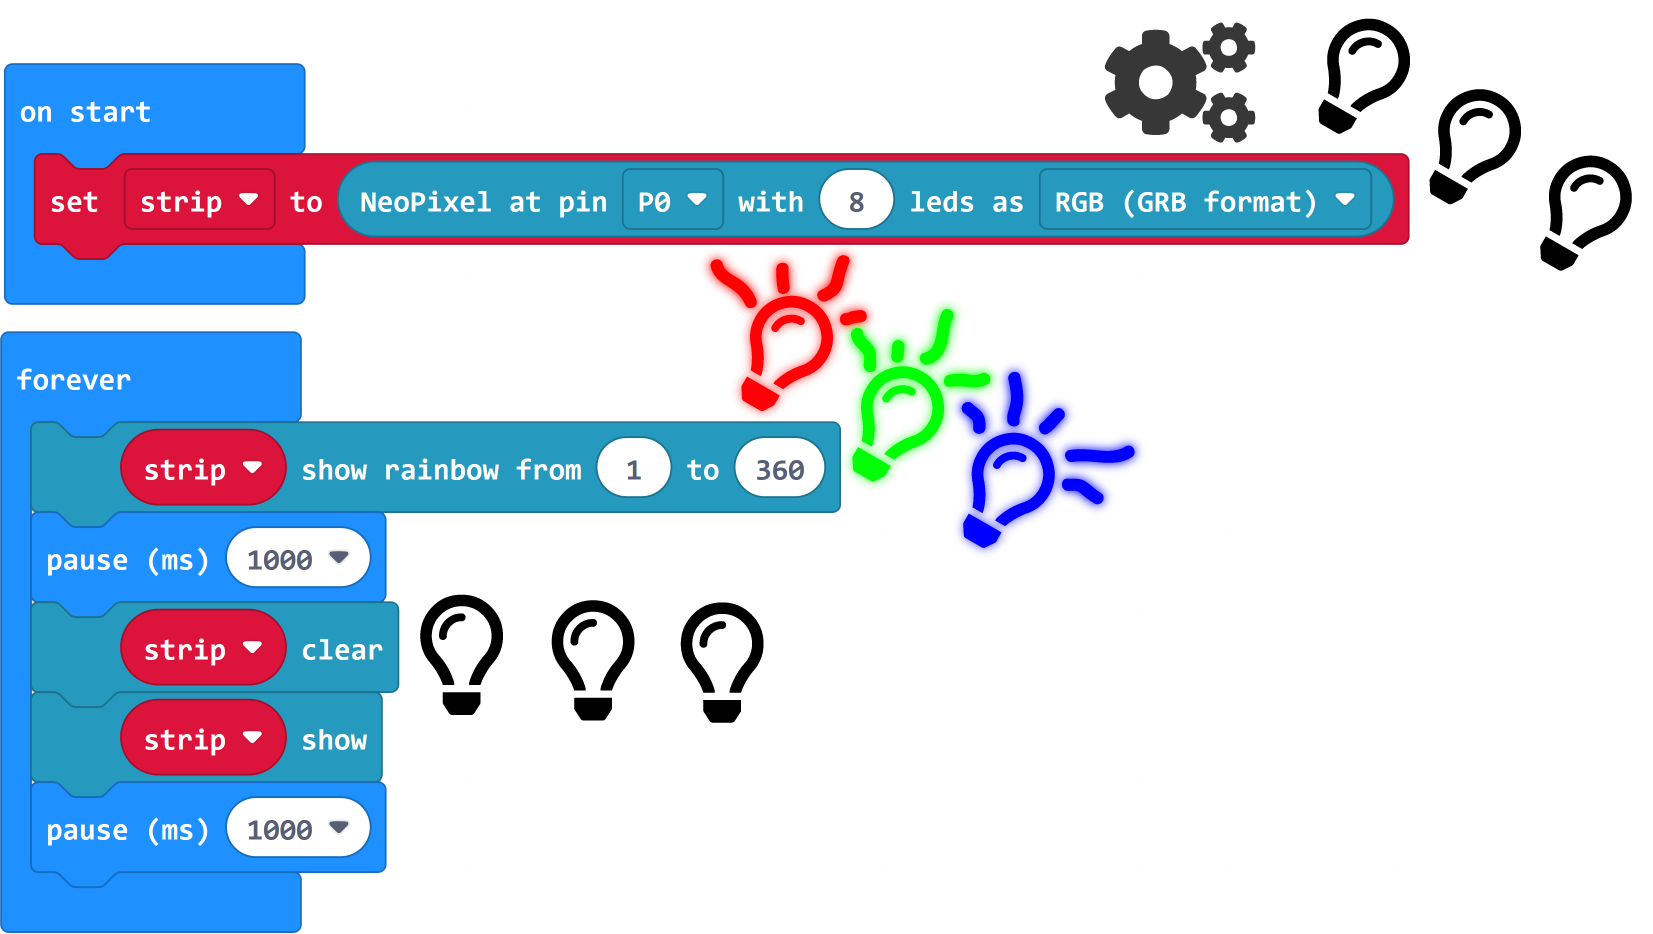
You may have noticed that nothing has changed with the last example. Some LED instructions, such as the "strip.clear()" block, require an additional instruction to become active. For this we use the "strip.show()" block. You will see that the following example will now work as planned.
However, the change of state does not only have to take place between on and off. You can also simply switch between different lighting variants. In the next example we change in a second cycle between the rainbow effect and the front headlight illumination of the Joy-Car.
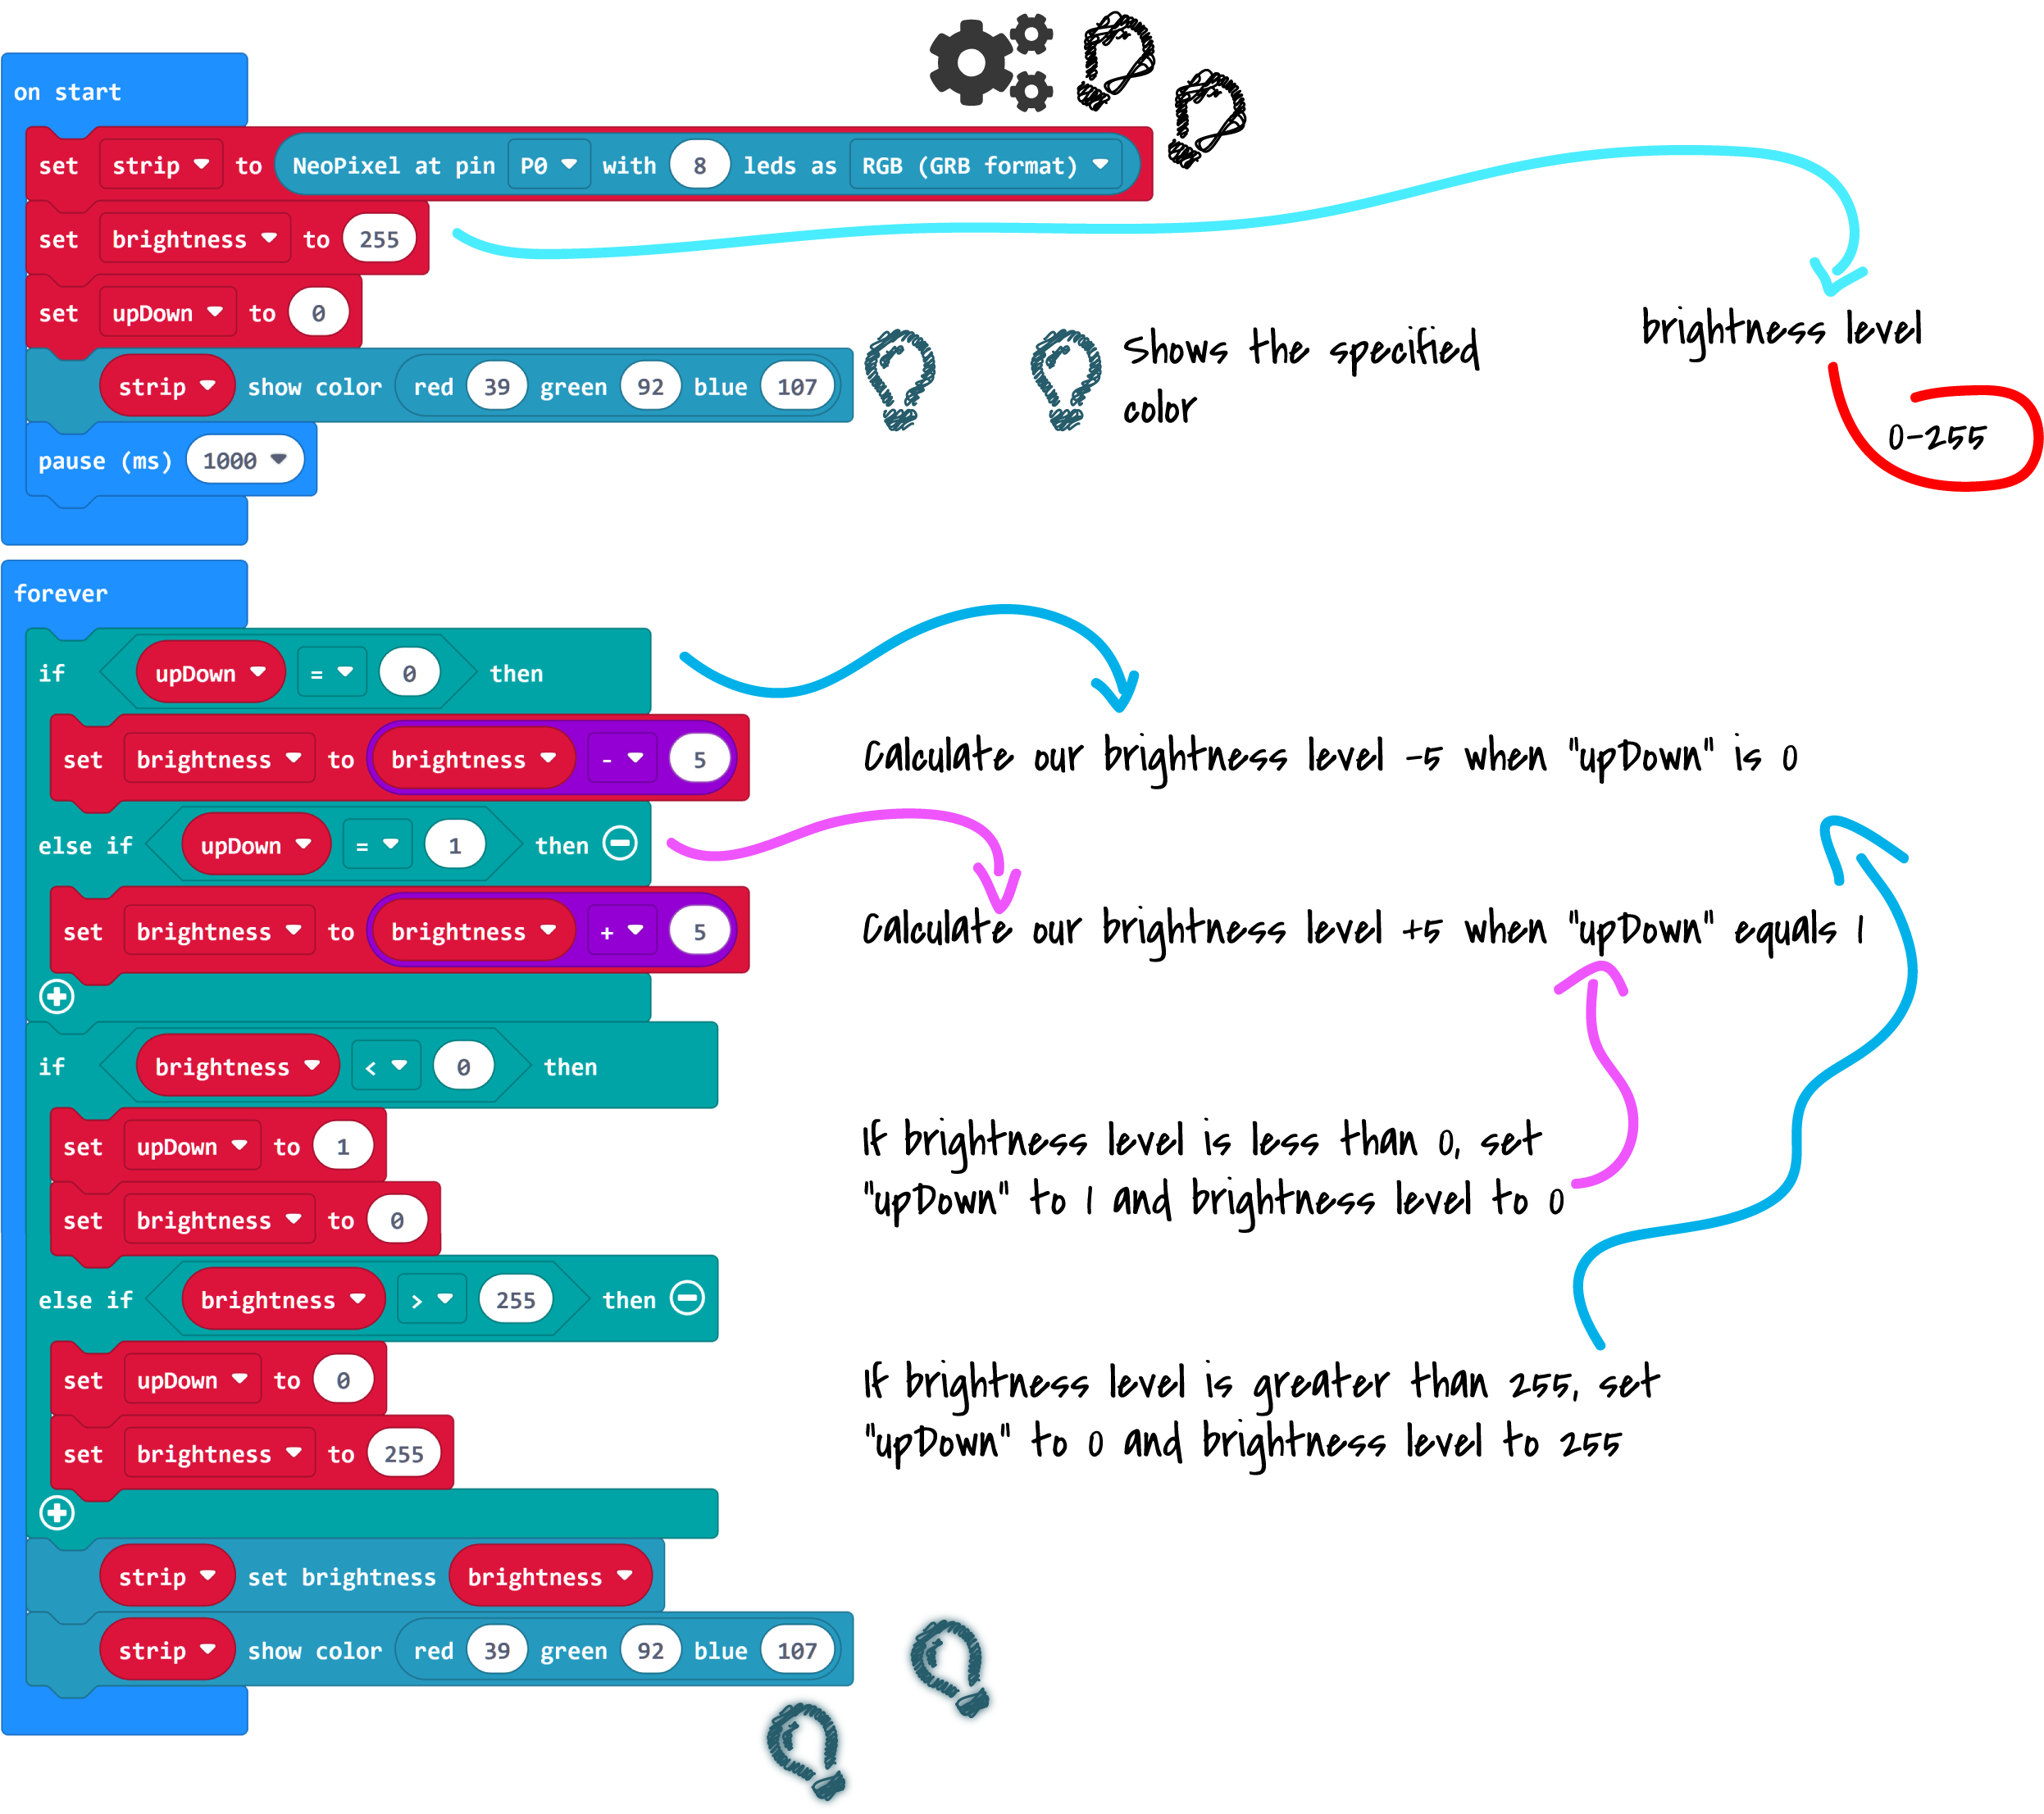
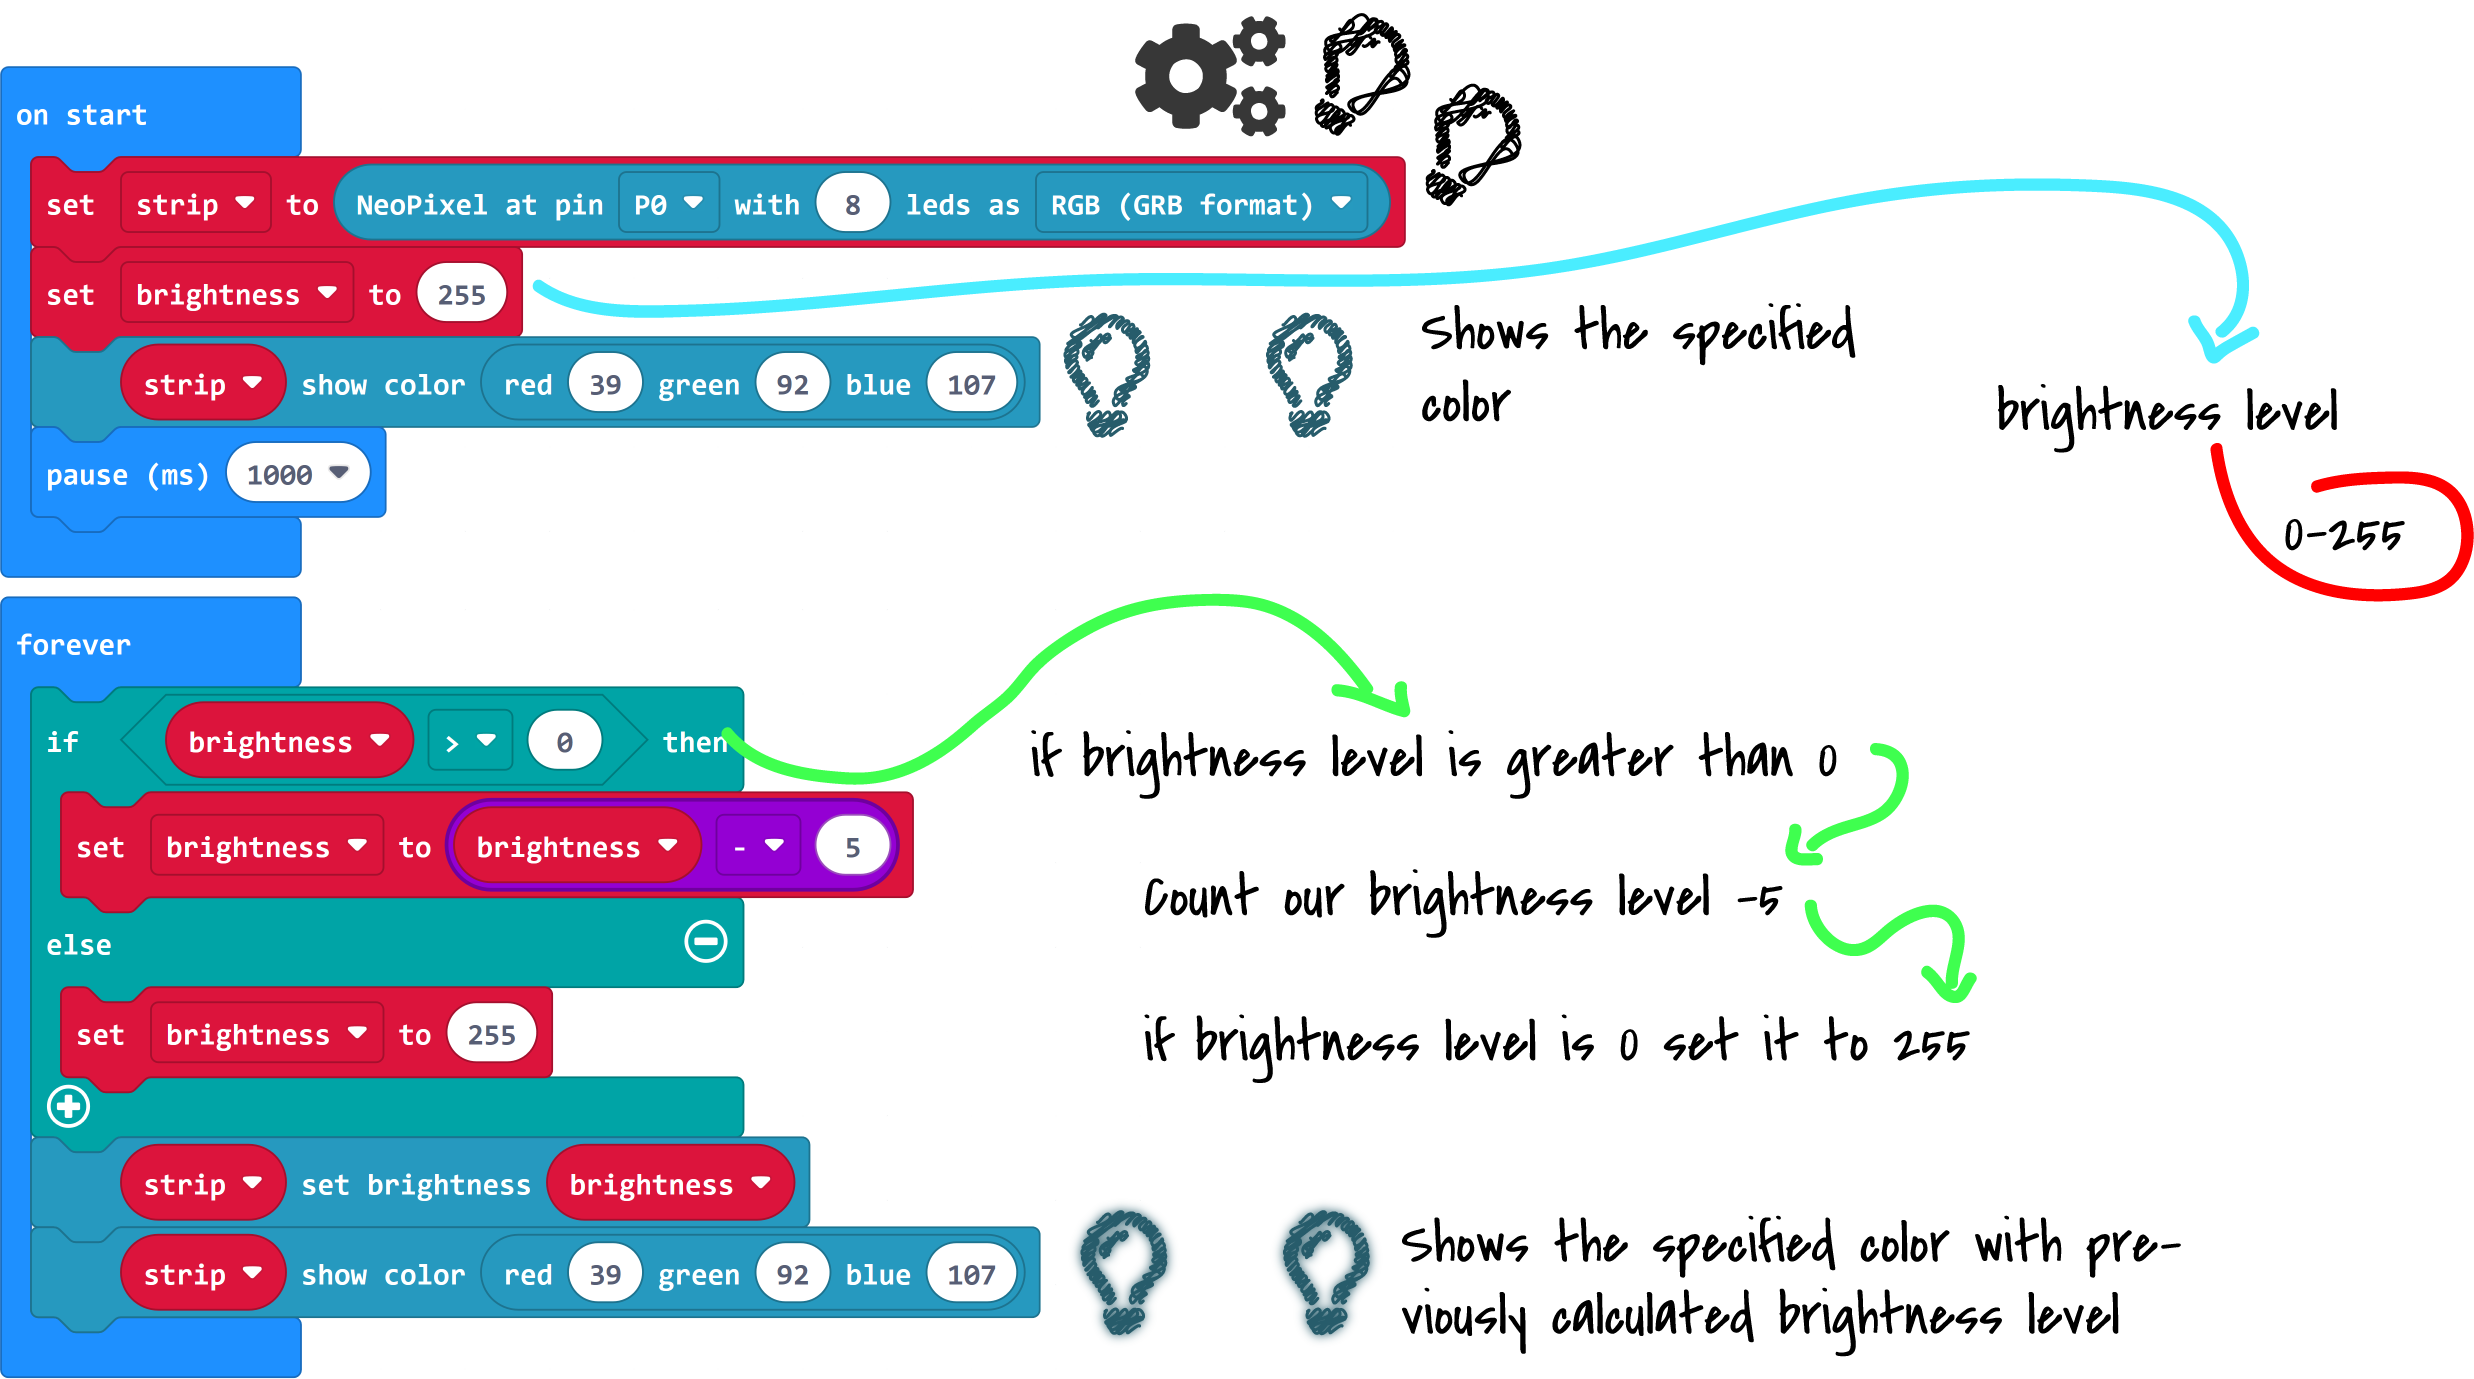
Now we go one step further and add a brightness effect to our lighting, where the brightness is reduced more and more. In our "on start" block we first initialize our LED units as usual. Additionally we create a variable "brightness" and set its value to 255, this variable will be responsible for our brightness, and set a color for our LEDs with the "strip.showColor(...)" block.
Note: The brightness can be set in a value range from 0 to 255.
In our "forever" block we first check our "brightness" variable. If its value is above 0, we decrease the value by 5. If not, we reset it to 255. This way we make sure that our effect is permanent and doesn't end after the first pass. Now we update our brightness to the value stored in our "brightness" variable. We do this with the "strip.setBrightness(...)" and the "strip.showColor(...)" block.
You want it a bit more detailed? Try our next example! Here we extend our blocks so that the brightness is permanently faded up and down. We still control the brightness with our "brightness" variable. To be able to distinguish between fading up and fading down we also use the "upDown"-variable. With this variable we can distinguish between the two states.